
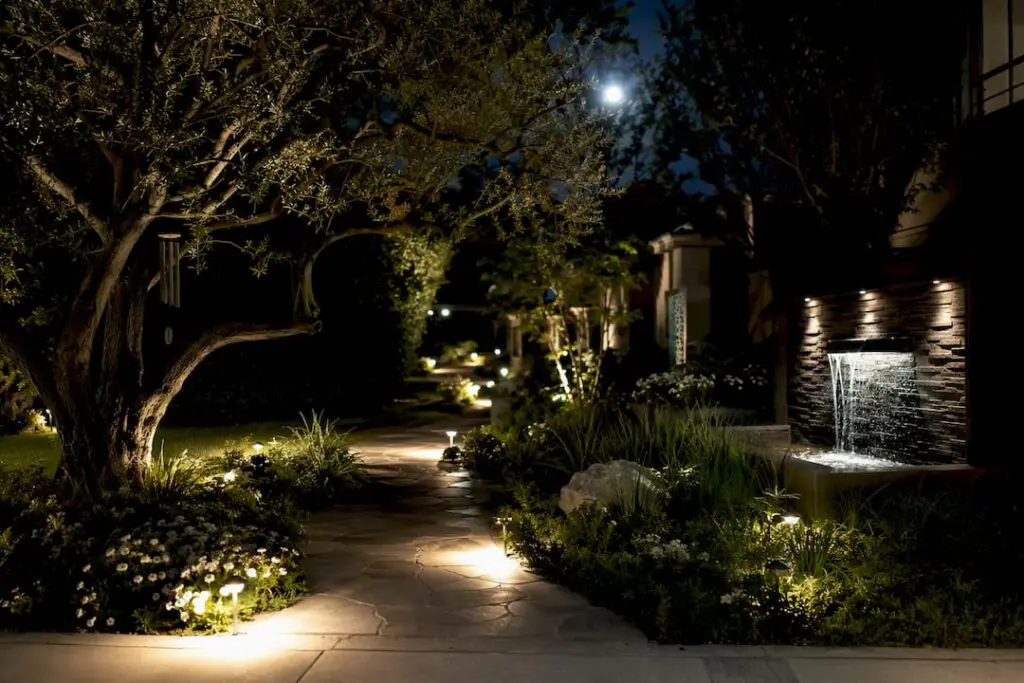
Start by choosing three to five “hero” elements on your property, then plan the rest around three layers of light: ambient, task, and accent. That single decision, made before you buy a single fixture, separates lighting that looks professionally designed from lighting that looks like a hardware-store impulse buy.
Three rules make everything else in this guide easier to apply:
-
Pick one warm color temperature, between 2700K and 3000K, for the entire property. Mixing temperatures is the fastest way to make a system look unfinished.
-
Hide the light source. Aim at the surface you want illuminated, not toward eye level, so no one ever looks directly at a bulb.
-
Think in layers, and let some areas stay darker. A little restraint reads as intentional; blasting every corner with light reads as amateur.
The Basics
Great landscape lighting depends on choosing one warm color temperature, layering ambient, task, and accent light, and hiding every source so the eye sees surfaces instead of bulbs.
| Point | Details |
|---|---|
| Pick one color temperature | Use 2700K to 3000K across the whole property to avoid the mismatched look of mixed temperatures. |
| Layer three types of light | Combine ambient, task, and accent lighting rather than lighting every area at equal brightness. |
| Hide the source, control glare | Aim fixtures at surfaces, not eye level, and use shielded fixtures to prevent light trespass. |
| Size transformers with a buffer | Add total fixture wattage, then apply a 20 percent buffer before choosing a transformer size. |
| Know when to call a pro | DIY suits a single uplight or short path run; multi-zone systems and trenching call for Fernandez & Sons. |
Table of Contents
Design Principles Behind Great Landscape Lighting Ideas
Professional landscape lighting rarely uses more fixtures than a DIY setup. It uses fewer, placed with intention. This Old House frames the discipline around three layers: ambient light sets overall visibility, task light covers steps and paths for safety, and accent light draws the eye to a specific tree, wall, or architectural feature.
Contrast matters as much as brightness. The Lighting Research Center at Rensselaer Polytechnic Institute notes that harsh jumps between a bright spot and total darkness strain the eye, while gradual transitions feel natural and comfortable. Aim for soft falloff rather than a hard edge between lit and unlit areas.
Three mistakes give away a DIY job every time:
-
The runway effect — evenly spaced path lights in a perfectly straight line, which looks more like an airport taxiway than a garden.
-
Mixed color temperatures — one fixture at 3000K next to another at 5000K makes the whole yard look mismatched, even if each light works fine on its own.
-
Over-lighting — too many fixtures at full brightness, which flattens depth instead of creating it.
Pro Tip: Before buying a full system, borrow or buy two or three inexpensive fixtures and test them outside after dark. Fine Homebuilding suggests a mockup of roughly six accent lights and six path lights to judge the effect before committing to a full layout — what looks right on paper often looks completely different against real bark, brick, or siding.
Landscape Lighting Ideas Worth Copying
Every yard has different focal points, but most successful designs pull from the same handful of techniques. Here is where each one earns its place.
-
Pathway and bollard lighting. Low, downward-facing fixtures along a walkway. Best for driveways, front walks, and garden paths where guests need to see footing without glare in their eyes.
-
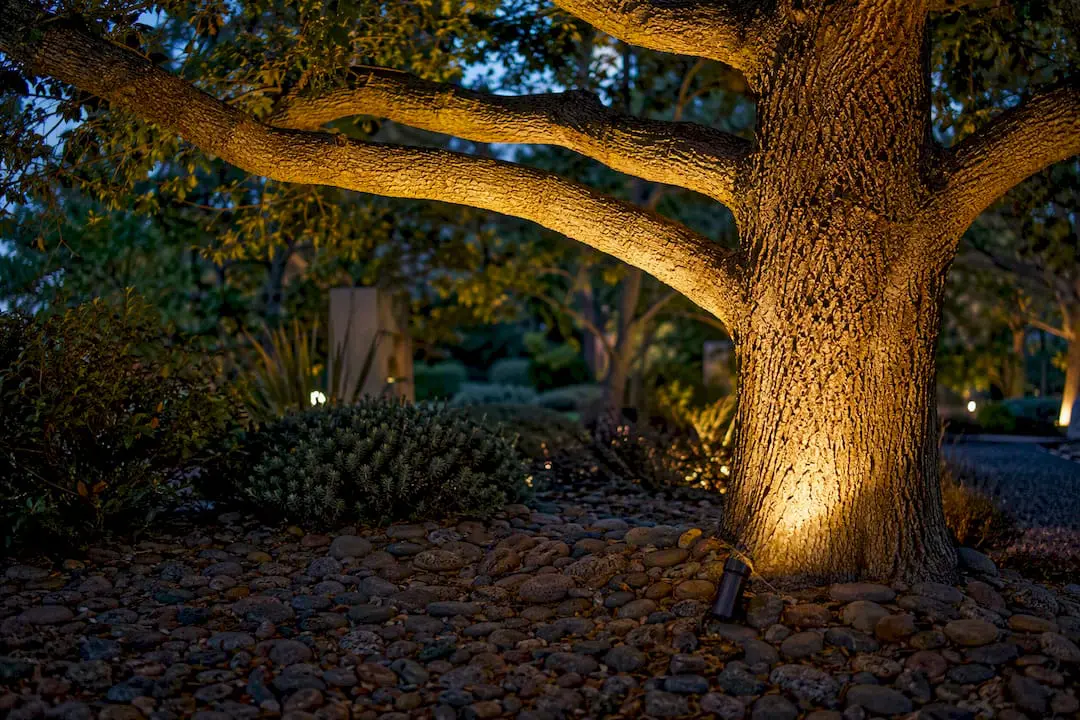
Tree uplighting and moonlighting. Uplighting places a narrow-beam fixture at the base of a tree, aimed up through the canopy for dramatic shadow play. Moonlighting flips the concept, mounting a fixture high in the branches to cast a soft, dappled glow downward that mimics moonlight. Great for a specimen oak or maple that anchors the yard.
-
Wall grazing and facade washing. Grazing uses a narrow beam close to a textured wall to exaggerate brick or stone texture with shadow. Washing uses a wider beam farther back to bathe a flat surface evenly. Use grazing on stone veneer, washing on smooth siding.
-
Step, deck, and in-grade well lights. Small fixtures recessed into risers, decking, or the ground itself. These exist primarily for safety on elevation changes, and they double as a subtle design accent.
-
String and bistro lights, pergola downlights, pool-area lighting. Overhead string lights over a patio or pergola create an inviting glow for evening dinners; small downlights integrated into pergola beams add task lighting for a dining table below. Near pools, low-glare, shielded fixtures keep the area safe without reflecting off the water’s surface.
Each of these works better paired with its neighbor than standing alone. A path plan without a hero uplight feels flat; an uplit tree without any path lighting looks like a stage set with no audience seating.
Choosing Fixtures, Beams, and Optics That Perform
Low-voltage LED is the residential standard for good reason. DOE research confirms LEDs use a fraction of the energy of older halogen fixtures and last many times longer, which matters when a fixture is buried in mulch and hard to reach for a bulb swap.
Color temperature deserves its own decision, made once and applied everywhere. The 2700K to 3000K range reads as warm white, close to candlelight, and it flatters brick, stone, and most plant material. Mixing temperatures, even between two similar-looking fixtures, is one of the most common signs of an amateur install.
Beam angle and optics do the rest of the work:
-
Narrow beams (10 to 25 degrees) for uplighting trees, columns, and other vertical elements.
-
Wide beams (60 degrees or more) for washing walls, fences, and broad flat surfaces.
-
Adjustable optics on higher-end fixtures let you fine-tune spread without buying a new lamp.
Outdoor fixtures also need to survive weather, not just look good on day one. Check the Ingress Protection, or IP, rating before buying: anything installed at grade or in a garden bed should carry at least IP65 for dust and water resistance. Brands like Kichler, VOLT, WAC Lighting, and Coastal Source all build fixtures to professional-grade IP standards and consistent color output across a full product line, which matters more than it sounds once you are trying to match a new fixture to one installed two years ago.
How Do You Space and Aim Landscape Lighting Fixtures?
Professionals often use what’s called the T-method: a main run of lighting along the primary path or driveway, with secondary runs branching off toward the front door, side gate, or a garden bed. It keeps the layout organized instead of a tangle of individual runs back to the transformer.
For path light spacing, resist the urge toward perfect symmetry. Staggering fixtures on alternate sides of a walkway, roughly eight to ten feet apart depending on the fixture’s spread, creates a natural rhythm instead of the runway look mentioned earlier.
Setback distance matters for uplighting. Place a fixture close to a tree trunk, angled so the beam catches the canopy rather than blasting straight up the bark. Viewed from above, a good layout looks like a loose zigzag, not a straight row of dots.
Wiring, Transformers, and Voltage Drop Basics
Add up the wattage of every fixture on a run, then apply a buffer. That total helps determine the transformer size you need, and Fine Homebuilding’s guidance on low-voltage systems walks through common sizes, typically 150, 300, and 600 watts for residential setups.
Voltage drop shows up as fixtures dimming the farther they sit from the transformer. Splitting a long run into two shorter runs, or stepping up wire gauge on longer stretches, solves most of it without needing an oversized transformer.
Use direct-burial-rated cable and waterproof, gel-filled connectors at every splice. Loose or corroded connections are the most common failure point in a low-voltage system, not the fixtures themselves.
Pro Tip: Add a photocell or timer at the transformer, and consider zoning your runs by area (front facade, backyard, path) rather than wiring everything to one switch. It costs little upfront and makes seasonal adjustments and troubleshooting far easier later.
Cutting Energy Use and Light Pollution
Landscape lighting doesn’t have to run all night at full brightness to do its job.
-
Choose LED over halogen for the efficiency gains DOE data documents.
-
Use timers or photocells so lights only run when it’s actually dark.
-
Zone dimmable circuits so entertaining areas can run bright while path lights stay low.
Alcon Lighting’s design guidance recommends shielded fixtures aimed downward, paired with warm color temperatures, to limit light trespass onto neighboring yards and reduce glare into the night sky. Unshielded, upward-facing floodlights disrupt nocturnal wildlife and can bleed light into a neighbor’s bedroom window. Pointing fixtures down and shielding the source solves both problems at once.
DIY vs. Hiring a Landscape Lighting Contractor
A single tree uplight or a short path run is well within DIY territory. Multi-zone systems, trenching under a driveway, or anything touching line-voltage service should go to a licensed professional.
Costs climb fastest when lighting has to integrate with hardscaping, like conduit run beneath a new patio, or when a run has to travel a long distance from the nearest power source.
Three Starter Layouts to Try First
-
Front-entry highlight: 4 to 6 accent uplights on the facade and a hero tree, plus 4 path lights along the walkway. Warm 2700K, moderate lumen output.
-
Backyard entertaining: overhead string lights across the patio, two uplights on nearby trees, step lights on any elevation change, and one dimmable ambient zone.
-
Safety-first path plan: 6 path lights staggered along the walk, plus two step lights at the entry. Watch for glare and hot spots during your nighttime mockup.
What Installers Wish Every Homeowner Knew
At every splice, use silicone-filled wire nuts or gel-filled connectors, never plain electrical tape. Moisture finds its way into any unprotected connection within a season or two, and that’s the callback we see most often.
Hidden-source placement is the other habit that separates a professional look from a DIY one. The GLTE best-practices guide treats this as a core principle: if you can see the bulb, the fixture is in the wrong spot. Fernandez & Sons stages a nighttime mockup on every project for exactly this reason, testing placement against real materials before finalizing a layout.
Fixture Types and Where Each One Belongs
Matching fixture type to location prevents most placement mistakes before they happen.
Uplights sit at grade, aimed upward at trees, columns, or facade features. They create the dramatic shadow-and-light contrast that makes a yard look designed rather than simply illuminated.
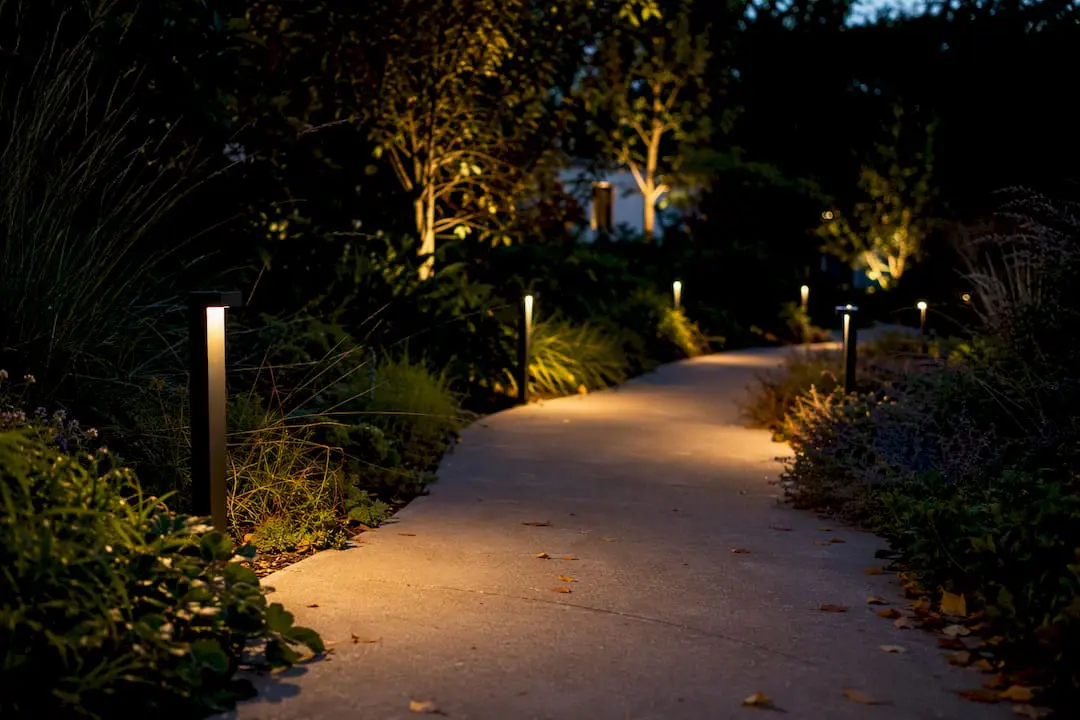
Path lights stand 18 to 24 inches tall, casting a downward pool of light onto walkways. They handle safety and wayfinding, not drama.
Step lights mount directly into risers or the vertical face of a step, throwing a thin band of light across the tread below. Anywhere there’s a change in elevation, a step light belongs there.
In-grade well lights sit flush with the ground, useful on driveways, patios, or anywhere a raised fixture would create a tripping hazard or get clipped by a mower.
Deck lights are small, recessed fixtures built into decking boards or railing posts, providing just enough light to navigate a deck safely after dark without floodlighting the whole structure.
Floodlights cover large areas with a wide, even beam. They’re the right call for security lighting near a driveway or garage, but the wrong call for anything meant to look elegant, since flood beams tend to flatten texture rather than reveal it.
Grazing fixtures sit close to a textured wall, aimed nearly parallel to the surface so shadows fall across brick, stone, or stucco. This is the technique that makes stone veneer or a fieldstone retaining wall look genuinely dimensional after dark.
Keeping a Landscape Lighting System Running for Years
Most landscape lighting problems trace back to three causes: dirty lenses, shifted aim, and water intrusion at connections.
Clean fixture lenses twice a year. Dirt, pollen, and hard-water spots dim output far more than most homeowners expect, and a five-minute wipe-down often restores half the brightness a fixture seemed to have lost.
Check aim after any mulching, planting, or heavy storm. Growing shrubs and settling soil shift fixtures out of position gradually, so a tree uplight aimed perfectly in spring can be aimed at a fence by fall.
If a section of the system goes dark, work backward from the transformer. Check the breaker and transformer output first, then trace the run for a loose connector before assuming a fixture has failed outright. Gel-filled connectors that have cracked or come apart are the most common culprit, not burned-out LED modules, which tend to fail gradually rather than all at once.
Inspect wiring anywhere it crosses a garden bed that gets dug into seasonally. A trowel or shovel nicking a buried cable is one of the most common causes of a dead zone appearing partway through a system with no obvious cause.
Smart Controls for Landscape Lighting
Photocells and mechanical timers still do the basic job: turn lights on at dusk, off at a set hour. But smart controls add flexibility that pays off within the first season.
App-based transformers let you adjust on and off times remotely, useful when daylight saving time shifts sunset by an hour overnight and a timer set in June looks wrong by August. Zoned smart control also lets you run the backyard entertaining zone at full brightness for a party while keeping the front path dimmed for security, all from one app instead of separate switches.
Some systems integrate with existing smart-home platforms, letting landscape lighting join the same schedule as interior lights or security cameras. That’s a genuine convenience upgrade, but it’s not a requirement for a great-looking system. A simple photocell and a well-designed layout will outperform a poorly planned system with every smart feature installed. Automation controls when the light turns on, not whether the layout looks professional in the first place.
The DIY Mistakes We See Most Often
The same three problems show up again and again: too many fixtures at full brightness, visible bulbs creating glare, and mismatched color temperatures across a single property.
A simple workflow avoids all three: map hero elements, choose one color temperature, mock up a few fixtures at night, install in layers, then adjust after the first season once you’ve lived with it.
How Fernandez & Sons Brings Landscape Lighting Ideas to Life
Planning a layout is one thing; for professional-installation references and examples of full-service offerings, consider permanent outdoor lighting installations that show coordinated, expert results. Trenching wire, sizing transformers correctly, and integrating fixtures into a patio, retaining wall, or outdoor kitchen without redoing hardscape later is another. Fernandez & Sons has spent over a decade building outdoor living spaces across Morris and Somerset Counties, and lighting design gets built into the plan from day one rather than bolted on afterward.

That means uplighting a hero tree, grazing a new stone veneer wall, or wiring step lights into a fresh set of masonry steps all happen as one coordinated project instead of three separate headaches. Every estimate is free, every project comes with a satisfaction guarantee, and the same team that pours your patio can wire the lighting that makes it usable after sunset. If you’re ready to move from planning sketches to an actual installed system, request a free design consultation and find out what a coordinated hardscape-and-lighting plan looks like for your property.
Frequently Asked Questions
What’s the best color temperature for landscape lighting? Between 2700K and 3000K works for nearly every residential application. It reads warm and natural against brick, stone, and greenery, and staying consistent across the property avoids the mismatched look that comes from mixing temperatures.
How far apart should path lights be spaced? Roughly eight to ten feet, staggered on alternating sides of the walkway rather than lined up symmetrically. Exact spacing depends on each fixture’s beam spread.
Do I need a licensed electrician for landscape lighting? Low-voltage systems, typically 12 volts, are generally DIY-friendly for smaller projects. Anything connecting to line-voltage household power, or a large multi-zone system with trenching, is worth handing to a professional.
How many lights does a typical front yard need? A modest starter plan often runs 8 to 10 fixtures: a handful of accent uplights on a facade or hero tree, plus path lights along the main walkway. Scale up gradually rather than lighting everything at once.
Can landscape lighting run on solar power? Small solar path lights exist, but they generally produce far less consistent output than low-voltage LED systems and struggle in shaded yards. For a reliable, uniform look, a wired low-voltage system remains the stronger choice.