
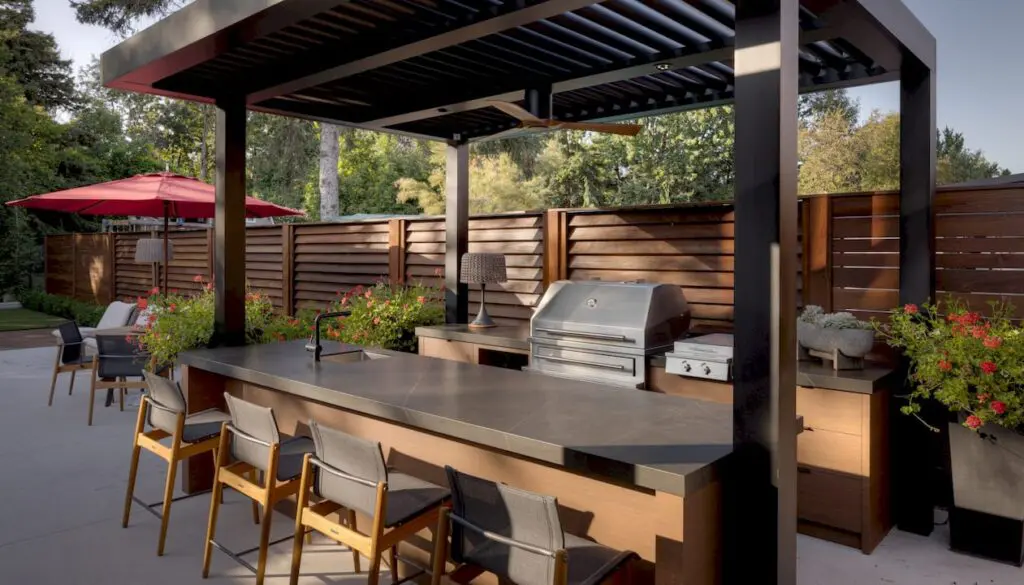
Design your outdoor kitchen layout around the grill. Place it first, then build prep space, storage, ventilation, and utility runs around that anchor point. For most backyards, an island or L-shape gives you the best mix of workflow and guest interaction.
If your project involves gas lines, permanent masonry, or electrical work, hiring a licensed contractor protects you from costly rework. Simple modular builds are more forgiving for a DIY weekend project.
Before you sketch anything, lock down three things:
- Which utilities you need on site: gas, electric, water, and drainage
- Whether the structure will be covered, which changes your ventilation requirements
- Tape out the footprint on your patio and physically walk the layout before you build
Key Takeaways
A grill-centered island or L-shape layout, planned around locked-in utilities and tested with a taped walk-through, prevents most costly outdoor kitchen mistakes.
| Point | Details |
|---|---|
| Design around the grill | Place the grill first, then build prep, storage, and utilities around it. |
| Lock utilities before building | Confirm gas, electric, water, and drainage routing before any masonry work starts. |
| Follow clearance minimums | Keep 42-inch work aisles and 12-inch grill landing space at minimum, per manufacturer specs. |
| Tape and walk the layout | Test cooking and serving movement with painter’s tape before construction begins. |
| Hire pros for permanent work | Fernandez & Sons handles utility coordination, masonry, and permitting for lasting, weatherproof builds. |
Table of Contents
- What Is the Best Outdoor Kitchen Layout to Start Planning With?
- Which Outdoor Kitchen Layout Fits Your Backyard?
- How Do You Design an Outdoor Kitchen Layout Step by Step?
- How Much Space Do You Need Between Counters and Seating?
- What Materials and Appliances Should Go in Your Outdoor Kitchen?
- What Are the Biggest Outdoor Kitchen Layout Mistakes?
- When Should You Hire a Contractor for Your Outdoor Kitchen?
- Ready to Build a Custom Outdoor Kitchen That Lasts?
- Where to Find More Outdoor Kitchen Layout Tools
- Sources
What Is the Best Outdoor Kitchen Layout to Start Planning With?
Start with a short readiness checklist before you touch a single stone or appliance spec sheet. Skipping this step is how homeowners end up with a beautiful island that’s twelve inches too narrow for the grill they actually wanted.
Decide how you cook. A weekend griller feeding four people needs a different footprint than a family that hosts twenty people every Fourth of July. Frequency, technique (grilling versus smoking versus pizza oven), and typical guest count all shape your final size.
Pick one person to run point. Someone needs to coordinate the mason, electrician, and plumber so nobody shows up to install a countertop over an unfinished gas line.
Work through these before you finalize anything:
- Confirm gas, power, water, and drainage access points
- Study your site: prevailing wind direction, sun exposure, distance from the house, and how people will walk through the space
- Set a budget band and decide between modular/prefab components or a custom masonry build
- Modular kits move faster and cost less upfront
- Custom masonry islands last longer and match your home’s exterior finishes
Which Outdoor Kitchen Layout Fits Your Backyard?
Four layouts cover almost every backyard, and picking the wrong one is the single most common regret homeowners report after their outdoor kitchen is finished.
Island (linear) layouts put every appliance and counter section in one straight run, often floating in the yard away from the house. They work well for mid-size patios and give you a clean sightline back to the house or pool. Most homeowners land here because a linear layout scales easily from a simple grill station to a full cooking wall.
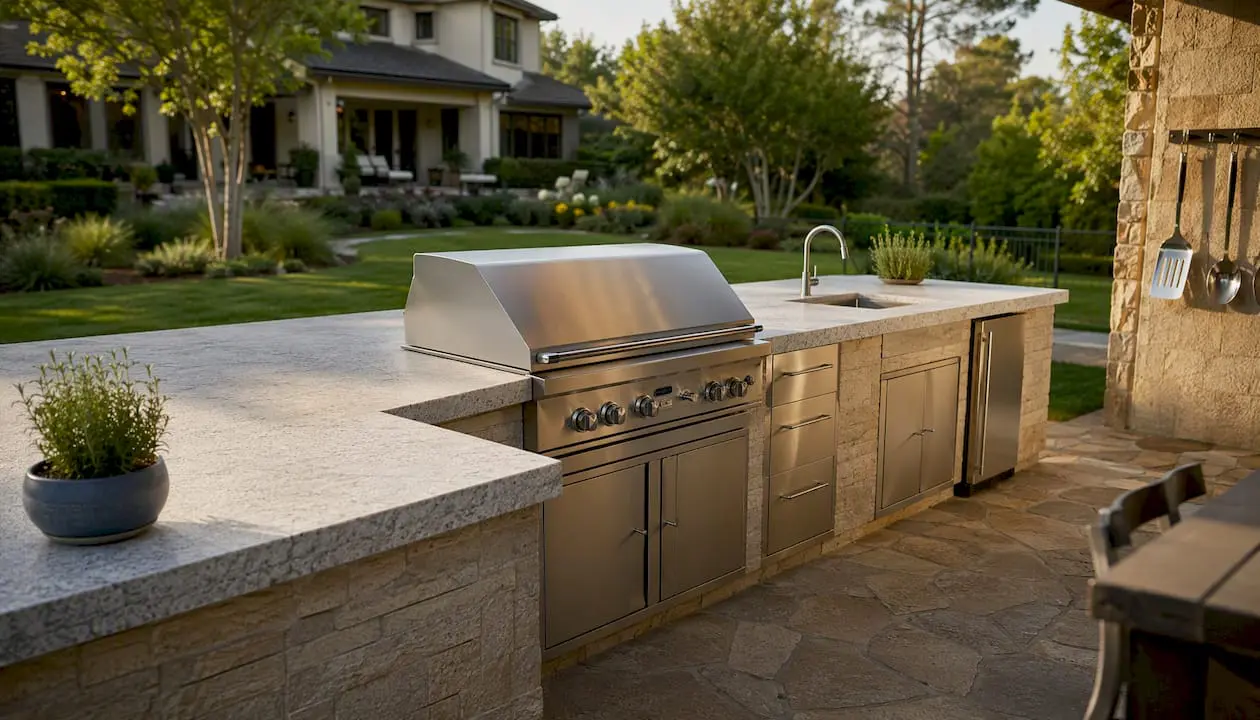
L-shape layouts wrap around a corner, which frees up more counter space in a smaller footprint. This is the go-to choice for tight patios where you still want a sink, prep zone, and grill without eating your whole yard.
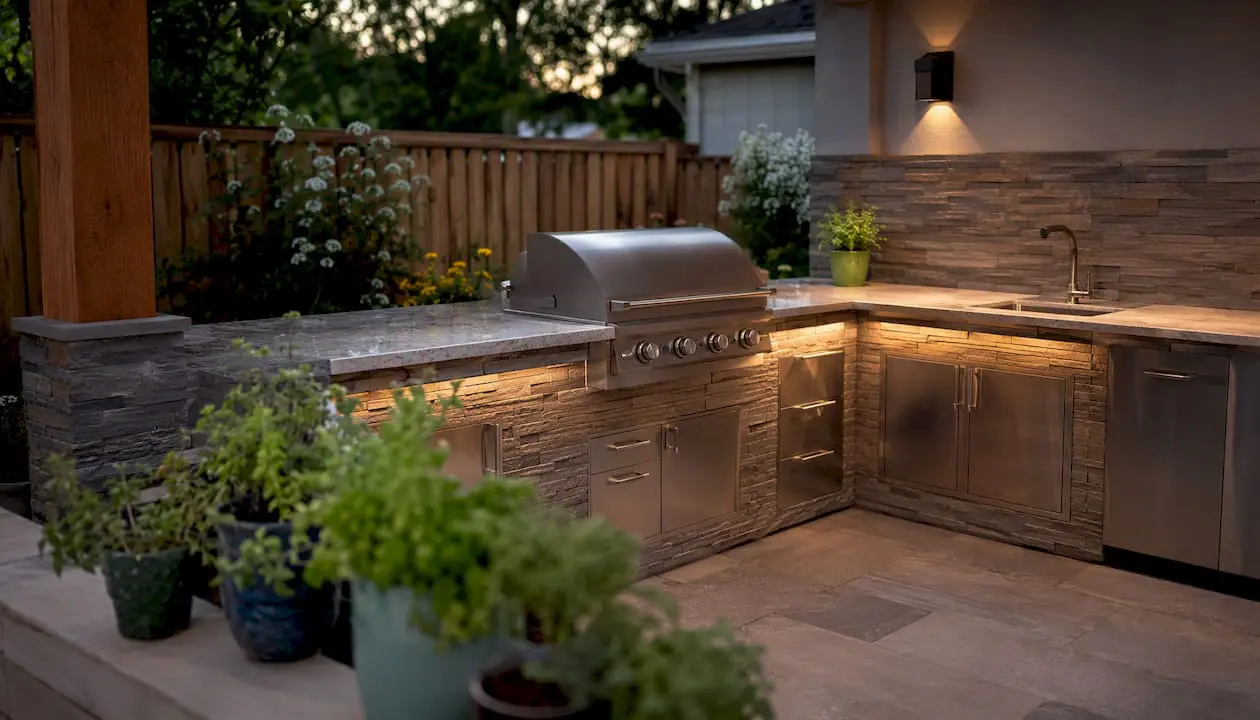
U-shape layouts enclose the cook on three sides. They suit larger multi-cook builds where two people work at once, but they need real square footage to avoid feeling like a cockpit.
Galley layouts run two parallel counters facing each other, which fits covered, year-round kitchens where you want appliances close at hand in a defined footprint.
- Small patios: L-shape or linear
- Poolside kitchens: island, oriented so the cook faces the water
- Covered, year-round kitchens: galley
- Large builds with multiple cooks: U-shape
Pro Tip: Face your grill so smoke drifts away from your seating area, not into it. Check which way your yard’s prevailing wind typically blows before you commit to a direction.
How Do You Design an Outdoor Kitchen Layout Step by Step?
A layout that looks good on paper can fall apart the moment you start cooking in it. This sequence catches problems before they become expensive.
- Define your use case: how often you cook, what techniques you use, and your must-have appliances
- Assign one project lead to coordinate every trade involved
- Survey the site: measure the space, note sun exposure, wind direction, door swings, and any slope
- Choose your layout shape based on available space and how you move while cooking
- Plan utility routing early. Gas, electric, water, and drainage lines are far cheaper to place before concrete pours than after
- Choose a ventilation strategy if the kitchen will be covered or enclosed; hood sizing depends on your grill’s BTU output and the structure’s ceiling height
- Select outdoor-rated appliances and materials matched to your climate
- Plan lighting and power circuits, including GFCI protection and dedicated circuits for major appliances
- Size counters, landing zones, and seating, keeping minimum clearances in mind
- Tape the layout on the ground with painter’s tape and physically walk through cooking and serving motions
- Finalize materials, finishes, and a maintenance plan
- Run a pre-build checklist covering permits and trade scheduling
Architects who design outdoor kitchens professionally still apply the classic work-triangle between grill, prep, and storage, keeping that triangle’s total perimeter compact so nobody’s walking twenty extra feet per plate.
Pro Tip: Step 10 isn’t optional. Tape and walk-through testing is the cheapest insurance you’ll buy on this entire project.
How Much Space Do You Need Between Counters and Seating?
Cramped outdoor kitchens are the number one complaint after the fact, and the fix is almost always a measuring tape you should have used earlier.
Work aisles need a 42-inch minimum for a single cook, and 48 inches is preferred if two people will work side by side, according to RCS Gas Grills’ clearance guide. Counters for prep work sit around 36 inches high; bar seating counters run closer to 42 inches. Counter depth typically falls between 24 and 30 inches, depending on the appliances behind it.
- Landing space: 12 inches minimum on each side of the grill, 24 inches preferred on at least one side
- Stool spacing: allow roughly 24 inches per seat, plus knee clearance under any overhang
- Leave enough room behind seated guests that a server or cook can pass without squeezing through
Always check your specific appliance manuals for exact clearance and venting requirements before finalizing dimensions. Manufacturer specs override any general rule of thumb.
What Materials and Appliances Should Go in Your Outdoor Kitchen?
Most functional builds share a similar appliance shortlist, centered on the grill and built outward from there.
- Built-in grill as the centerpiece, usually the first appliance placed
- Refrigerator or beverage fridge rated for outdoor use
- Sink with a water and drainage line
- Side burner for sauces, boiling, or a wok station
- Weatherproof storage for tools, fuel, and serving items
For countertops and cabinet faces, Dekton, granite, and concrete hold up well across most climates, while powder-coated aluminum and marine-grade polymer resist rust and swelling in cabinet frames. Skip quartz and standard interior tile outdoors. Both crack or discolor under UV exposure and temperature swings. If you’re within a few miles of the coast, corrosion resistance matters more than style, and durable, boat-grade hardware is becoming standard in humid regions. Homeowners weighing cabinet hardware and door options can find useful guidance in selecting durable pantry and cabinet doors that hold up to daily use.
Modular kits get you cooking faster and cost less upfront. Custom masonry islands cost more but last longer and match your home’s existing stone and brick finishes.
What Are the Biggest Outdoor Kitchen Layout Mistakes?
Building without a plan is the single costliest mistake homeowners make, but it’s rarely the only one on the list.
- Skipping the layout plan entirely and building appliance by appliance
- Using indoor-grade materials that fail within a season or two outdoors
- Underpowered ventilation in a covered structure, which traps heat and smoke
- Tight clearances that make cooking or serving physically uncomfortable
- Placing the kitchen in full sun or directly in the prevailing wind path
Common mistakes homeowners repeat include treating an outdoor kitchen like an indoor one, which usually shows up as the wrong materials or no weather planning at all.
Pro Tip: Size your ventilation hood to your grill’s BTU rating, not the other way around, and winterize appliance lines every fall in colder climates to avoid cracked fittings come spring.
When Should You Hire a Contractor for Your Outdoor Kitchen?
Hire a licensed contractor once your project involves gas lines, permanent masonry, or a result you want to be weatherproof for decades, not seasons. DIY suits simple modular kits; permanent utility work does not.
Fernandez & Sons has spent more than a decade building masonry, hardscaping, and outdoor living projects across Morris and Somerset Counties, and that experience shows up in how a project gets coordinated, not just how it looks.
- Full site survey before any design work begins
- Layout tape test walked through with the homeowner
- Materials selection based on climate and budget
- Utility coordination across trades
- Clear timeline expectations and permit support from start to finish
A Note on Planning and Longevity
Good layouts get taped and walked before they get built. That one habit, checking wind and testing flow early, prevents most of the expensive mistakes homeowners make later.
Ready to Build a Custom Outdoor Kitchen That Lasts?
If you’ve read this far, you already know a taped-out layout and a solid materials plan separate a kitchen you’ll love for years from one you’ll be patching by next summer. Fernandez & Sons handles the part most DIY guides can’t: permanent masonry, gas and water utility coordination, and a finished stone island built to match your home, not just sit next to it.
Fernandez & Sons provides masonry, hardscaping, custom outdoor kitchen builds, and full project coordination, including permitting, across Morris and Somerset Counties. A site visit and free estimate cost you nothing and give you a real sense of what your yard can support. If you’re ready to move from taped outline to finished stone, request a free estimate and get a project timeline built around your kitchen, your budget, and your yard.
Where to Find More Outdoor Kitchen Layout Tools
For visual planning, the Coyote Outdoor Living design tool and Belgard outdoor kitchen plans both offer sizing and style inspiration.
- Yale Appliance’s 12-step design guide for appliance and ventilation planning
- Architect-level layout guidance on work-triangle spacing
- Clearance and aisle-width reference for island builds
- Manufacturer manuals and your local building code office for final verification before construction
Sources
- 12 Steps to Designing Your Outdoor Kitchen in 2026: What to Buy, What to Skip, and What Actually Matters
- Outdoor Kitchen Layout Secrets Straight from Architects
- The Ultimate Outdoor Kitchen Layout Guide | RCS Gas Grills
- Outdoor Kitchen Layouts: L-Shape, Linear, Galley & Corner
- Outdoor kitchen trends