
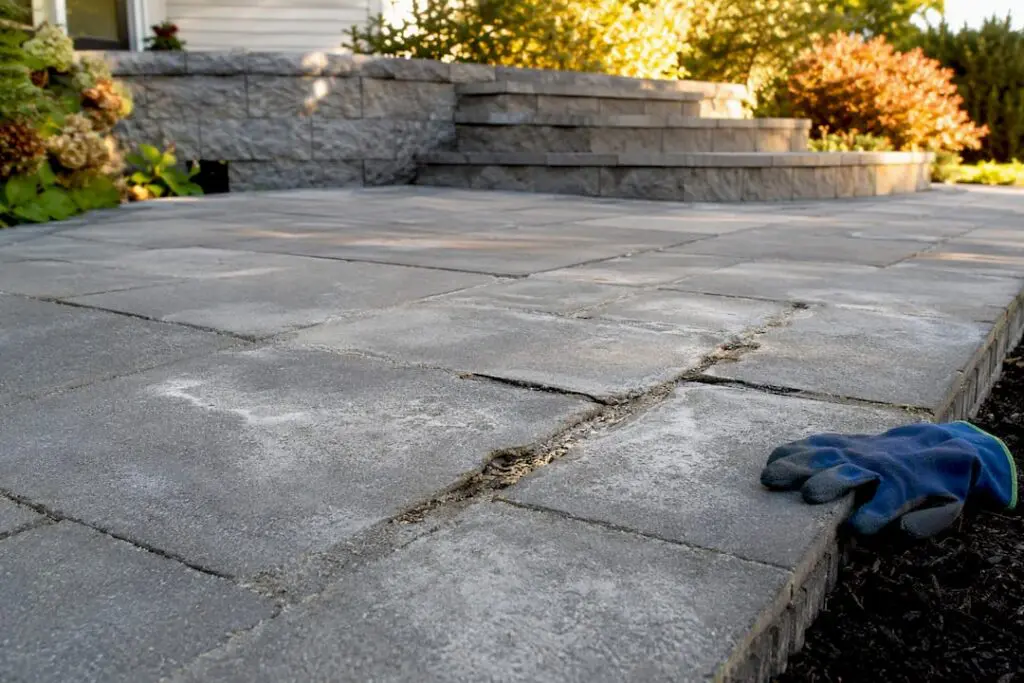
Most polymeric sand failures fall into one of three buckets: surface haze you can clean off, sectional joint damage you can rework, or a base and drainage failure that calls for full replacement. The fix depends entirely on which one you’re facing, so start by identifying the failure type before you touch a hose or a broom. Trade groups like ICPI and CMHA set the material and compaction standards that most installations fall short of, and crews like Fernandez & Sons see the same handful of mistakes on repeat. If many of your joints are affected or the pavers themselves are shifting, that’s your signal to call a professional instead of grabbing a garden hose.
Most polymeric sand failures are caused by improper installation, such as using the wrong material or inadequate compaction, leading to recurring issues.
Haze results from overwatering immediately after installation, and stubborn haze may require stripping and correct reactivation of the joints.
Washout occurs when the joint is underfilled or bridged, necessitating complete removal and refilling following proper layering and compaction procedures.
When a large portion of joints show signs of failure or paver shifting, the problem likely stems from base or drainage issues rather than the sand itself.
Regular maintenance, proper installation techniques, and addressing underlying drainage problems extend the lifespan of polymeric sand to 5-10 years.
Table of Contents
What Causes Most Polymeric Sand Problems
Polymeric sand fails for a short list of predictable reasons, and once you know what you’re looking at, the cause usually explains itself.
Haze shows up as a white or gray film on the paver surface. It forms when polymer binder gets activated on top of the joint instead of soaking down into it, usually from watering too heavily or too fast right after installation.
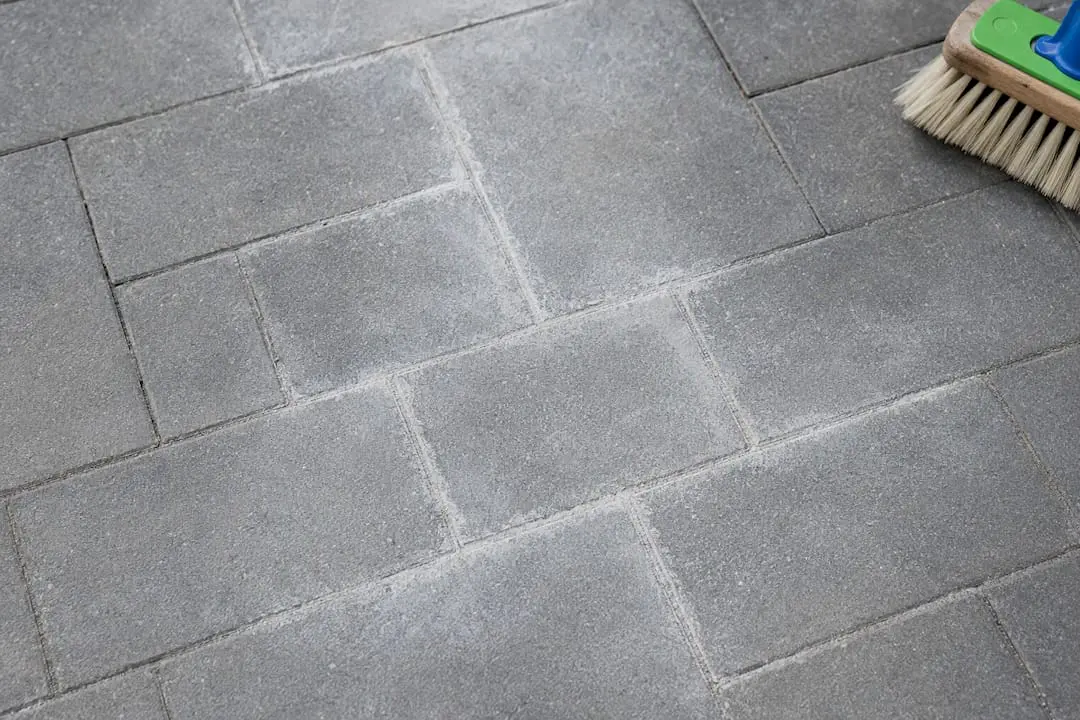
Soft or crumbling joints happen when the sand didn’t compact properly to begin with, or when it absorbed too much or too little water during activation. Either extreme keeps the binder from setting into a solid, flexible seal.
Washout after rain is what happens when sand bridges over the joint opening instead of filling it completely. Water finds the gap, pressure builds under the surface crust, and the whole joint empties out during a heavy storm.
Weeds and ants exploit any joint that’s shallow, under filled, or full of organic debris. Polymeric sand resists both when installed correctly, but a thin or dirty joint gives pests an easy foothold.
Picture framing (a stained border around each paver) and base failures often trace back to drainage. Water sitting under the joint or wicking up through porous stone will discolor the paver edges and eventually break down the polymer bond from beneath.
Here’s a quick reference for spotting each one:
-
Haze: cloudy white residue sitting on top of the paver
-
Soft joints: sand feels loose or crumbly when probed with a putty knife
-
Washout: visible gaps or empty joints after rain
-
Weeds/ants: growth or tunneling in specific joint sections
-
Picture framing: dark rings or discoloration around individual pavers
How to Fix Each Polymeric Sand Failure
Once you know what you’re dealing with, the repair sequence matters as much as the repair itself. Skipping steps is how a small haze problem turns into a full joint rework.
For haze:
-
Try dry removal first: a stiff push broom and a leaf blower clear most light haze without any moisture.
-
If residue remains, use a cleaner made specifically for polymeric sand haze, following the label’s dwell time.
-
For stubborn film, a light pressure wash at a wide fan angle and safe distance can lift it, but test a small area first.
-
If haze keeps returning, the joints may need to be stripped and reactivated correctly.
For soft or crumbling joints: remove the loose material down to a firm base, refill to the correct depth (typically flush to just below the paver’s chamfer), compact with a plate compactor, then mist with a fine spray followed by a light shower rather than a direct blast. Installer accounts consistently point to this two-stage wetting as the step most DIYers rush or skip.
For washout: confirm the joint bridged instead of filling, dig it out completely, refill in the recommended lift depths, compact between lifts, and keep the area dry for at least 48 hours after activation.
For weeds and ants: mechanical removal (a joint knife and stiff brush) handles isolated spots. Widespread infestation across several sections usually means the sand never sealed properly, and that calls for a rework rather than repeated spot treatment.
Pro Tip: If a joint keeps failing in the same spot no matter how many times you refill it, stop treating the symptom. Check the base underneath. Saturated or poorly compacted base material will keep pushing sand out until the drainage problem is fixed.
Preventing Problems Before They Start: Installation Checklist
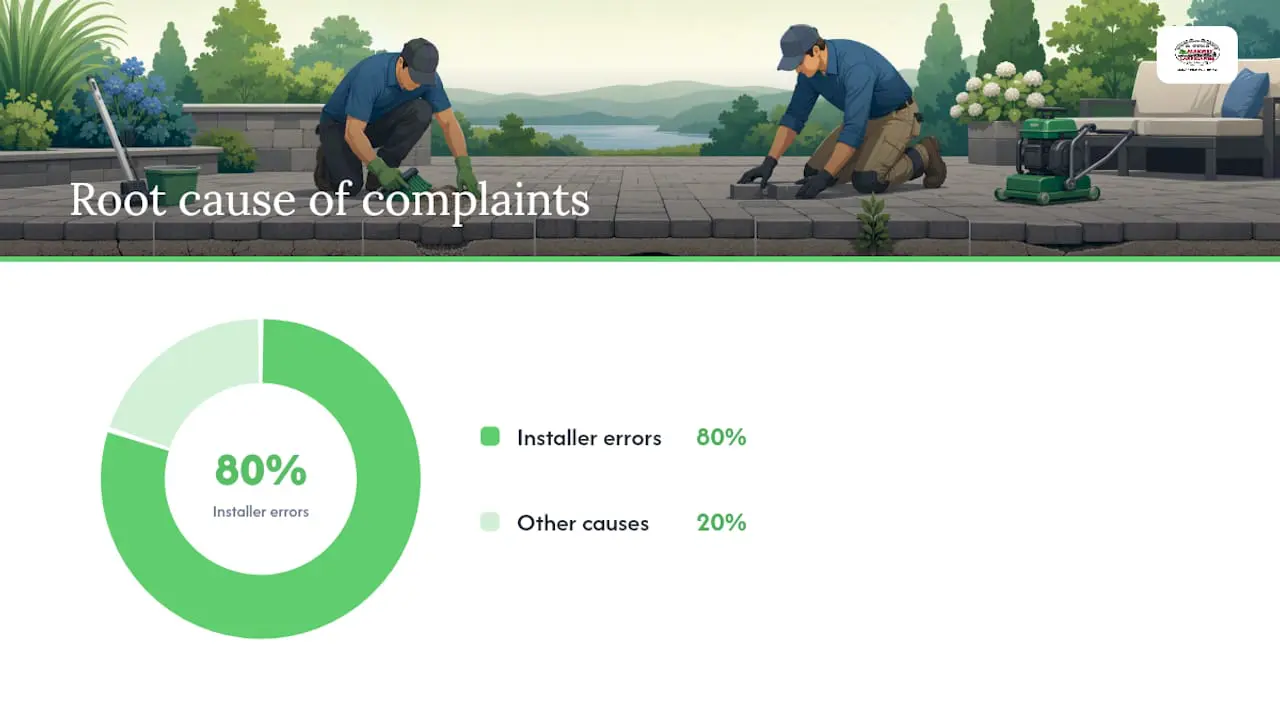
Roughly 80% of polymeric sand complaints trace back to installation mistakes rather than product failure, according to installer accounts in the trade press. Getting the prep work right eliminates most of what causes callbacks.
Material matters. Joint sand should conform to ASTM C144, and bedding sand to ASTM C33, per ICPI/CMHA guidance. Using stone dust or mismatched fines instead of proper gradation sand is a common shortcut that causes poor interlock down the line.
Before you open a bag, check:
-
Pavers are completely dry, inside and out, not just surface dry
-
Joints are clean and free of old sand, dust, and organic debris
-
Edge restraints are secure and base compaction is solid
-
Joint width matches the sand manufacturer’s stated range
Tools that actually matter:
-
A leaf blower for clearing dust before and after sweeping in sand
-
A plate compactor for consolidating both base and joint fill
-
An adjustable shower head nozzle for controlled, even misting
-
A stiff push broom for working sand fully into the joint
Pro Tip: Water in stages. A fine mist first, then a light shower, gives the polymer time to activate without washing the binder out of the joint. Blasting it with a hose nozzle set to jet is the single fastest way to undo a good installation.
When to Repair vs. When to Replace
A quick self-assessment saves you from either overreacting to a minor haze issue or underestimating a base problem that will keep coming back.
-
Under 15% of joints affected, no pooling water: spot repair is reasonable
-
15% to 40% affected, or recurring failure in the same spots: full joint rework is likely needed
-
Over 40% affected, visible paver shifting, or standing water after rain: base and drainage remediation is probably required
Run the tilt test: rock a few pavers near the failure by hand. Movement signals base trouble, not just a sand issue. Probe joint depth with a putty knife. Trade specifications recommend joints show less than a quarter inch of penetration once properly compacted. If it sinks deeper than that across multiple joints, plan on more than a surface fix. When water pools instead of draining within a few hours, that’s a job for a contractor experienced in paver repair, not another bag of sand.
Realistic Lifespan and Maintenance Schedule
Properly installed polymeric sand typically lasts 5 to 10 years, though constant moisture, heavy vehicle traffic, or freeze thaw cycles shorten that window considerably.
A simple seasonal routine keeps joints performing near the upper end of that range:
-
Sweep debris out of joints monthly during growing season
-
Inspect for early haze or soft spots each spring
-
Avoid pointing a hose or pressure washer directly into joints when cleaning pavers
-
Top up joints showing minor settling before they become full voids
-
Consider resealing pavers on a schedule that matches your sand manufacturer’s recommendations
Field Notes: What Installers Do Differently
Crews who install polymeric sand daily follow a rhythm that most DIY guides skip entirely. On install day, pros often cover the finished section overnight if rain is possible, keeping the newly activated binder protected during its critical cure window.
Non-negotiable tools on a professional job:
-
A non-leaking hose (leaks create random wet spots that ruin even activation)
-
An adjustable shower head style nozzle, never a jet setting
-
A commercial leaf blower for thorough dust removal before sanding
The most common DIY mistake in the field is watering too fast because the joints “look dry” on top when the sand underneath hasn’t fully absorbed yet. If you’ve reworked the same section twice and it’s still failing, that’s the point to bring in a professional inspection rather than a third attempt.
Pro Tip: Sand looks dry on the surface long before it’s actually dry all the way through. Wait longer between mist and shower than feels necessary, especially in humid weather.
A Note on Workmanship and Realistic Expectations
Good polymeric sand work isn’t about the bag you buy. It’s about compaction, timing, and water control done right the first time. Homeowners can fix small failures themselves, but recurring problems in the same spot almost always point to base or drainage issues that deserve a professional look before more time gets spent on repeat repairs.
— BG
Get Your Joints Fixed Right the First Time
If you’ve worked through the fixes above and the same section keeps failing, the problem probably isn’t the sand anymore. It’s the base underneath, and that’s a job that rewards experience over another bag of polymeric sand. Experienced masonry and landscaping contractors handle everything from targeted joint rework to full base and drainage correction to complete paver reinstallation.

Rather than guessing at compaction depth or watering technique on a section that’s failed twice already, a free estimate on masonry services gets you a professional read on whether you’re looking at a patch job or a base rebuild. If you’re still weighing whether to tackle it yourself, this breakdown of DIY versus hiring a contractor lays out the tradeoffs plainly. Either way, reach out to get your joints assessed before another storm finds the same weak spot.
Standards and Resources Worth Bookmarking
-
CMHA’s paver base and joint sand guidance for material and gradation specs
-
ICPI/CMHA technical specification for compaction and joint testing
-
Hardscape Magazine’s installer guide for real-world technique
Check these directly for project-specific requirements before starting a large repair or reinstallation.