
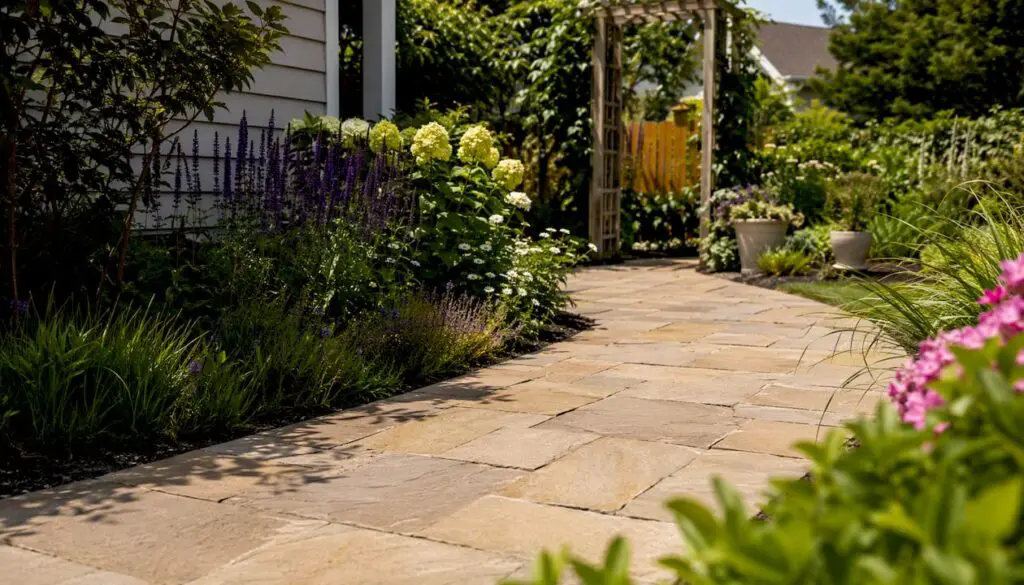
For most homes, a modular concrete or brick paver walkway built on a compacted crushed-stone base delivers the best combination of durability, curb appeal, and DIY friendliness. Resources like Lowe’s, HGTV, and This Old House all point to the same foundation principle: the base matters more than the surface material. Before you browse styles, take three quick actions to move from inspiration to planning.
Your immediate next steps:
- Measure your walkway’s length and width (aim for 48 inches wide for a comfortable two-person path).
- Pull two or three sample materials from a local supplier or Lowe’s to compare color and texture against your home’s exterior.
- Decide now whether this is a DIY project or a contractor job — that single decision shapes every material and timeline choice that follows.
Key Takeaways
A compacted crushed-stone base topped with 1 inch of leveling sand is the single most important factor in a paver walkway that stays level, drains properly, and lasts through New Jersey winters.
| Point | Details |
|---|---|
| Best material for most homes | Concrete or brick pavers on a compacted base offer the best durability and DIY accessibility. |
| Base depth rule | Use 4 inches of compacted crushed stone plus 1 inch of leveling sand; increase to 6 inches for clay-heavy or poorly drained sites. |
| Comfortable walkway width | Plan for 48 inches wide for two-person use; 36 inches is the accepted minimum for a single-file path. |
| When to hire a contractor | Complex grading, poor drainage, retaining walls, or large-format stone are reliable signals to call a pro. |
| Fernandez & Sons | Provides full-scope paver walkway installation across Morris and Somerset Counties, NJ, with free estimates. |
Table of Contents
- Paver walkway ideas that suit every home style
- Which materials hold up best for your climate and budget?
- Patterns, dimensions, and edging every homeowner should plan for
- How to build a durable paver walkway step by step
- Finishing touches that make a walkway feel complete
- Cost ranges, timelines, and how to decide whether to DIY
- Seasonal maintenance and winter care for paver walkways
- What a local hardscaping contractor sees that most DIY guides miss
- Fernandez & Sons brings expert hardscaping to Morris and Somerset Counties
- Sources
Paver walkway ideas that suit every home style
The best starting point is picking a style that fits your home’s architecture and your yard’s natural flow. HGTV’s pathway inspiration gallery shows how curves, planted joints, and material mixing change a walkway’s entire character, often more dramatically than a material upgrade alone. Here are the styles worth considering.
- Classic brick herringbone (front entry): Interlocking brick laid at 45 degrees creates a tight, formal look that suits Colonial and Tudor homes. Pairs naturally with a soldier-course brick border. Photo idea: red brick herringbone path leading to a white front door.
- Large-format concrete slabs (modern/contemporary): 24×24 or 24×48 concrete pavers with tight joints or grass infill read as clean and architectural. Best for flat lots with modern or transitional homes. Photo idea: gray slab path flanked by ornamental grasses.
- Flagstone with moss or thyme gaps (garden path): Irregular natural stone with planted joints softens a side yard or cottage garden. The planted gaps add color and reduce runoff. Photo idea: Pennsylvania bluestone steppers with creeping thyme between joints.
- Stepping stones over decomposed granite (informal garden path): Round or square pavers set into a DG bed create a relaxed, low-cost path through a planting area. Works well in dry climates and informal back gardens. Photo idea: circular concrete steppers across a golden DG bed.
- Cobblestone diamond accent (entry focal point): A cobblestone diamond or medallion inset into a concrete paver field creates a strong visual focal point at the front door. Photo idea: gray concrete field with a charcoal cobblestone diamond at the threshold.
- Curved bluestone path (side yard or pool approach): Gentle curves in cut bluestone guide the eye and slow foot traffic naturally. Bluestone’s dense surface handles freeze-thaw cycles well, making it a smart pick for New Jersey yards. Photo idea: blue-gray stone path curving past a hydrangea border.
- Grass-between-pavers (contemporary lawn integration): Pavers set with 2–3 inch grass joints blend the walkway into the lawn. A DIY example using this approach completed a 4.5 ft x 20 ft path in about three days for under $1,000 in supplies and tool rental. Photo idea: square gray pavers with lush green grass joints leading to a backyard gate.
- Porcelain tile stepping stones over gravel (pool deck approach): Large-format porcelain over a pea gravel bed looks high-end and drains well. Porcelain’s low absorption rate makes it freeze-thaw resistant. Photo idea: white porcelain rectangles over white pea gravel beside a pool.
- Mixed stone and brick (rustic farmhouse): Alternating brick courses with irregular fieldstone creates a collected, aged look that suits farmhouse and craftsman homes. Photo idea: warm red brick alternating with gray fieldstone along a front path.
- Checkerboard (formal garden): Alternating light and dark square pavers in a grid pattern add geometry to a formal garden or symmetrical front yard. Photo idea: cream and charcoal square pavers in a 2×2 checkerboard leading to a garden gate.
For flagstone design ideas specific to New Jersey yards, Fernandez & Sons has a dedicated guide worth bookmarking before you finalize your material choice.
Which materials hold up best for your climate and budget?
Material selection is where most homeowners make their most consequential decision, and climate should drive it as much as aesthetics. Dense materials like granite, bluestone, and porcelain resist freeze-thaw cycles far better than softer stones or decomposed granite, which suit warm, dry regions instead. This climate-first guidance is especially relevant for New Jersey homeowners dealing with hard winters.
Belgard maintains extensive pattern catalogs and inspiration galleries that are genuinely useful for visualizing color palettes and layout combinations before you commit to a purchase.
| Material | Durability | Freeze-Thaw Performance | Maintenance | Best Use Case |
|---|---|---|---|---|
| Brick | High | Good (dense units) | Re-sand joints every 3–5 years | Front entries, formal paths |
| Concrete pavers | Very high | Excellent | Seal every 3–5 years; re-sand joints | Any residential walkway |
| Natural flagstone/bluestone | High | Excellent (dense stone) | Seal annually; reset shifted stones | Garden paths, pool approaches |
| Porcelain | Very high | Excellent (low absorption) | Wipe clean; re-grout if needed | Modern designs, pool decks |
| Cobblestone | Very high | Excellent | Re-sand joints; occasional resetting | Accent features, driveways |
| Decomposed granite | Low–Medium | Poor (erodes in wet/freeze) | Re-grade annually | Dry climates, informal paths |
| Permeable pavers | High | Good | Clear joints of debris seasonally | Drainage-sensitive areas |
Mixing textures is one of the most cost-effective ways to achieve a high-end look. Pairing porcelain slabs with gravel infill, or stone steppers across a decomposed granite bed, controls material cost while adding visual depth. Current trend guidance points to large-format slabs, grass joints, and mixed stone-and-gravel combinations as the dominant contemporary direction.
Patterns, dimensions, and edging every homeowner should plan for
The pattern you choose affects how large or small a space feels, how much cutting is required, and how well the walkway holds together over time.
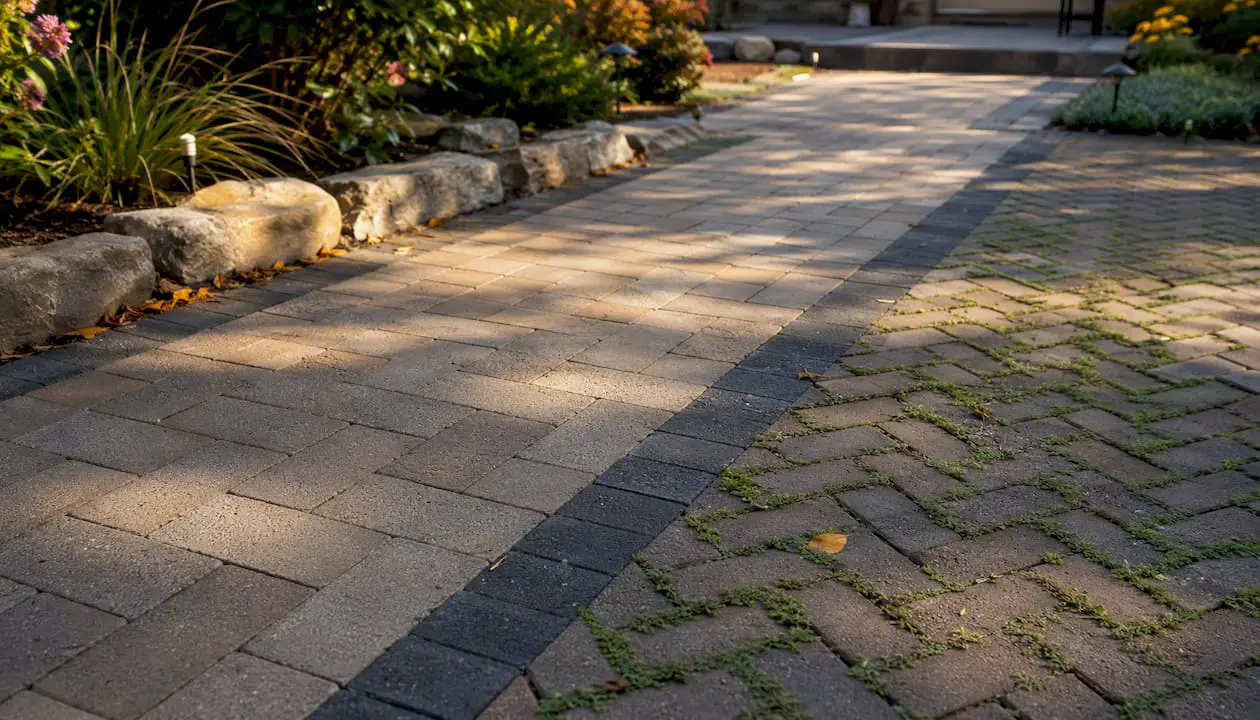
Popular patterns and their visual effects:
| Pattern | Visual Effect | Cutting Required | Best For |
|---|---|---|---|
| Herringbone (45° or 90°) | Dynamic, interlocking, formal | Moderate (border cuts) | Front entries, high-traffic paths |
| Running bond | Clean, directional, elongating | Low | Side yards, garden paths |
| Basketweave | Traditional, textured | Low | Cottage and farmhouse styles |
| Modular grid (large slabs) | Modern, open, architectural | Low–Moderate | Contemporary homes |
| Stepping stones | Informal, naturalistic | None–Low | Garden paths, lawn integration |
Dimension guidance is straightforward once you know the numbers. A comfortable two-person walkway runs 48 inches wide; 36 inches is the accepted minimum for a single-file path. For wheelchair accessibility, a 60-inch turnaround space is the standard reference point. Stepping-stone paths typically space individual pavers 18–24 inches on center, measured from the center of one stone to the center of the next, which matches a natural walking stride.
Edging keeps everything in place. Without a perimeter restraint, pavers migrate outward under foot traffic and freeze-thaw pressure. Aluminum or steel edge restraints secured with 6-inch spikes are the most reliable option for residential installs. Concrete curbs work well for formal designs; natural stone edging suits garden paths. A contrasting border course — one row of a different paver color or size — also frames the walkway visually while reinforcing the perimeter.
How to build a durable paver walkway step by step
The single most important installation rule: never lay pavers directly on dirt. A compacted base is what separates a walkway that lasts 20 years from one that shifts and heaves after the first winter.
Home Depot’s paver path guide uses a 20 ft x 3 ft example path (60 sq ft) with 28 12×12 pavers to illustrate material counts and sequencing — a useful reference for scaling your own project.
Step-by-step installation checklist:
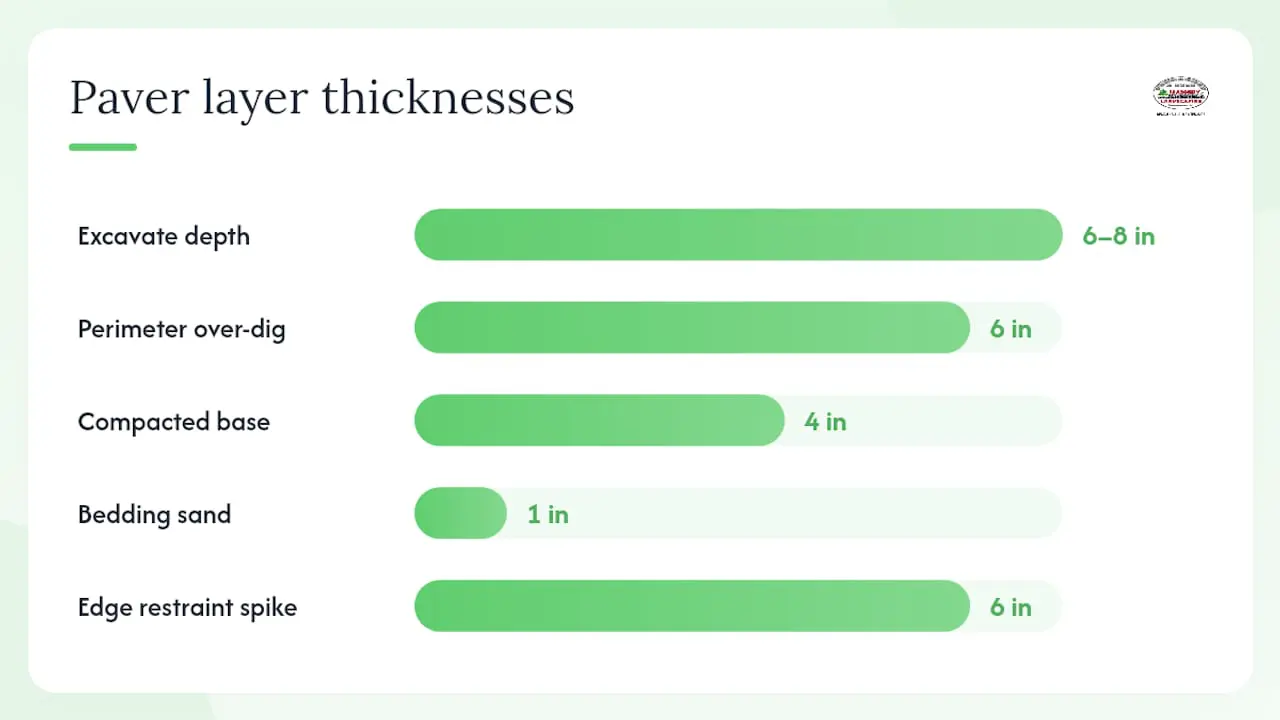
- Mark and excavate. Outline the path with stakes and string. Dig down 6–8 inches below finished grade to allow for base, sand, and paver thickness.
- Over-dig the perimeter. Extend the excavation approximately 6 inches beyond the planned footprint on each side. This gives edge restraints solid ground to anchor into.
- Grade for drainage. Slope the base away from structures at roughly 1/8 inch per foot to prevent water pooling.
- Add and compact crushed stone. Fill with 4 inches of compacted crushed stone (also called paver base or road base). Compact in 2-inch lifts with a plate compactor.
- Screed the leveling sand. Add 1 inch of coarse bedding sand and screed it flat. Do not compact the sand before laying pavers.
- Lay pavers. Start from a straight edge or corner. Keep joints tight and consistent. Use a rubber mallet to set each paver flush.
- Install edge restraints. Secure aluminum or steel edging along both sides with 6-inch spikes driven into the compacted base.
- Fill joints. Sweep polymeric sand into all joints. Mist lightly to activate the binding agent, then allow to cure per the manufacturer’s instructions.
- Final compaction. Run the plate compactor over the finished surface with a protective pad to seat all pavers evenly.
Base depth reference:
Pro Tip: Place a protective rubber pad or piece of carpet between the plate compactor and the paver surface during final compaction. Concrete and porcelain pavers scratch easily under direct metal contact, and a single pass without protection can ruin a finished surface.
This Old House’s concrete paver walkway guide covers the over-dig and edge-restraint spike technique in detail — worth reading before you rent equipment.
Finishing touches that make a walkway feel complete
A well-built base is invisible. What visitors actually see are the finishing details, and a few well-chosen ones do most of the visual work.
Joint fillers: Polymeric sand is the standard choice for most paver joints — it resists washout, discourages weeds, and locks pavers together. For a more naturalistic look, pea gravel works in wider joints (1 inch or more) on informal paths. Planted joints using creeping thyme, Irish moss, or Corsican mint suit garden paths with moderate foot traffic and add fragrance underfoot. Re-sand polymeric joints every 3–5 years as the binder breaks down.
Lighting does double duty: it improves safety after dark and extends the visual appeal of the walkway into the evening. Low-voltage in-ground path lights spaced 6–8 feet apart along the walkway edge create a clean, even glow without harsh shadows. Step lights recessed into a retaining wall or raised border add depth. Solar stake lights are easy to install but tend to dim significantly in winter — hardwired low-voltage systems are more reliable for year-round use in New Jersey.
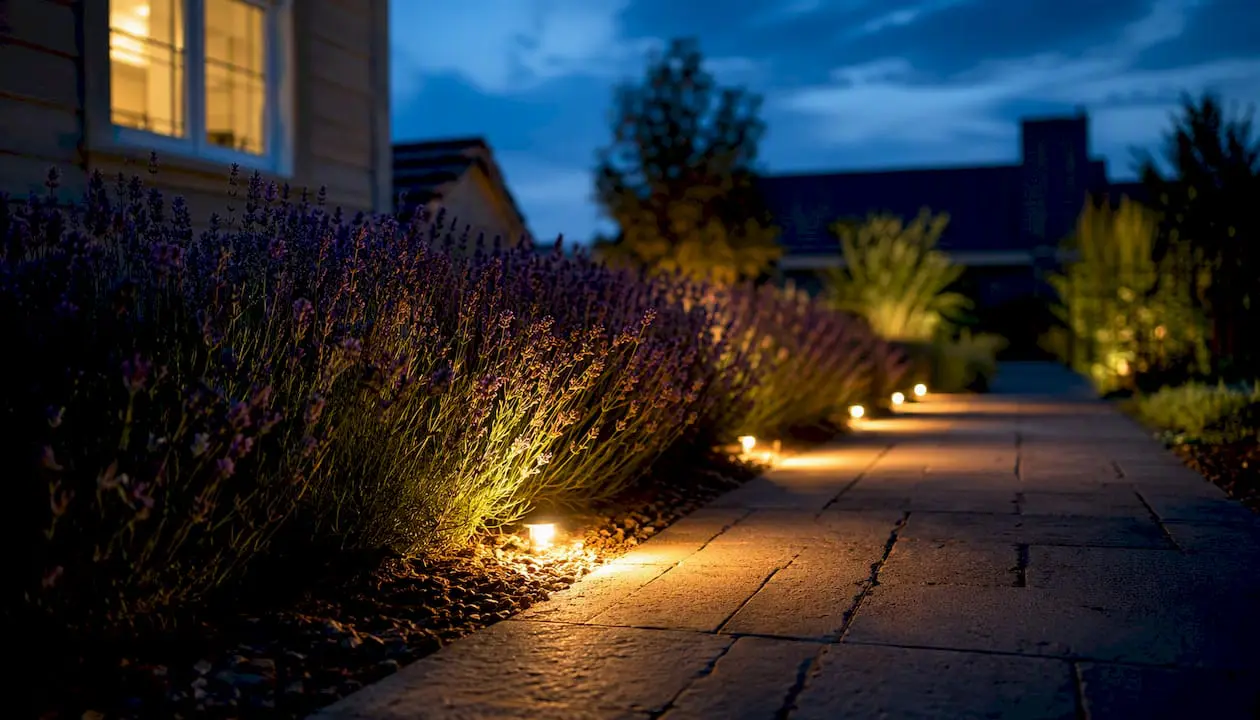
Border and edging finishes frame the path the way a mat frames a picture. A single course of a contrasting paver color (charcoal border on a gray field, or buff brick on a charcoal concrete base) creates a strong visual edge without additional cost. Low planting beds of ornamental grasses, lavender, or boxwood along both sides soften the hardscape and connect the walkway to the broader landscape. For ideas on how walkways integrate with outdoor living spaces and pool areas, Fernandez & Sons has local project examples worth reviewing.
Subtle curves and planted borders often increase perceived curb appeal more than an expensive material upgrade alone — a point HGTV’s pathway design coverage makes consistently.
Cost ranges, timelines, and how to decide whether to DIY
Paver walkway costs vary widely based on material, excavation complexity, and site access. Material-only costs for a basic concrete paver path typically run $3–$8 per square foot for the pavers themselves, plus base materials, sand, and edging. Contractor-installed walkways in the Northeast generally range from $15–$30 per square foot installed, depending on material choice, grading needs, and drainage work. Natural stone and porcelain push toward the higher end; standard concrete pavers sit in the middle.
For a small DIY path, the numbers are encouraging. A grass-between-pavers project covering roughly 90 square feet came in under $1,000 in supplies and tool rental, completed over three days. Scaling up to a 200 sq ft front walkway with bluestone or porcelain will cost more in materials, but the labor savings from DIY remain significant if the site is flat and well-drained.
Timeline estimates:
- DIY, 60–100 sq ft flat path: 2–3 days (excavation, base, install, jointing, cure time).
- Pro install, 100–200 sq ft with minor grading: 1–2 days on site, plus 24–48 hours for polymeric sand to cure.
- Complex project with drainage or retaining walls: 3–5 days or more depending on scope.
DIY vs. hire decision checklist:
- DIY is realistic when: the site is flat, drainage is straightforward, the path is under 150 sq ft, you can rent a plate compactor, and you have a full weekend available.
- Hire a pro when: the yard slopes significantly toward the house, drainage is poor or unclear, the project involves a retaining wall, permits are required, or the material is large-format porcelain or natural stone that requires precise cutting.
- Red flags that mean call a pro: standing water after rain near the planned path, a neighbor’s retaining wall nearby, or an HOA that requires submitted plans before any hardscape work.
For NJ homeowners weighing the DIY vs. contractor decision on a paver project, Fernandez & Sons has a dedicated guide that walks through the trade-offs honestly. For landscape upgrades that add measurable value in New Jersey specifically, a well-installed walkway consistently ranks among the highest-return projects.
Seasonal maintenance and winter care for paver walkways
A paver walkway requires modest but consistent care to stay level, clean, and structurally sound through New Jersey’s freeze-thaw cycles.
Routine maintenance checklist:
- Sweep regularly to prevent organic debris from staining joints and encouraging weed growth.
- Re-sand polymeric joints every 3–5 years, or sooner if you notice joint erosion or weed intrusion.
- Seal concrete pavers and natural stone every 2–4 years depending on traffic and exposure. Porcelain generally does not require sealing.
- Reset any individual pavers that shift or rock before they create a trip hazard.
Winter care: Rock salt (sodium chloride) is the most common deicing product, but it accelerates spalling on concrete pavers and can damage natural stone surfaces over time. Use calcium chloride or sand instead, particularly on bluestone, flagstone, or unsealed concrete. Avoid metal-edged snow shovels on paver surfaces — a plastic blade or rubber-edged pusher protects joint sand and paver faces. When using a snowblower, keep the auger set high enough to clear the surface without catching on paver edges.
Frost heave is the most common structural issue in cold climates. It happens when water beneath the base freezes and expands, pushing individual pavers upward. A properly compacted base with adequate drainage largely prevents it. If you notice a section of the walkway rising each winter and settling back in spring, the base likely needs regrading and recompaction — a job worth handing to a contractor before it spreads.
For residential paving maintenance guidance that covers long-term care of paved surfaces, additional technical reading is available from industry sources.
What a local hardscaping contractor sees that most DIY guides miss
The most common installation mistake on residential paver projects is not the pattern choice or the material — it is an undersized base. Homeowners often excavate 3–4 inches when the site actually needs 6 inches of compacted stone because the soil drains poorly or has a high clay content. The result looks fine for a season, then shifts noticeably after the first hard freeze.
The second most frequent error is skipping or under-securing edge restraints. A walkway without properly spiked edging will spread at the perimeter within two to three years, leaving gaps that collect debris and create tripping edges. Over-digging the footprint by 6 inches on each side — as This Old House recommends — gives the edging spikes solid, undisturbed ground to grip.
Drainage is the third issue that catches homeowners off guard. A path that looks level may actually direct water toward a foundation if the grade is not checked before excavation. Checking local permit requirements and HOA rules before digging is also worth a phone call — some municipalities in Morris and Somerset Counties require a permit for hardscape projects above a certain square footage, and HOAs may have material or color restrictions.
Fernandez & Sons brings expert hardscaping to Morris and Somerset Counties
NJ homeowners who want a professionally installed walkway without the guesswork of a DIY project have a straightforward local option. Fernandez & Sons Masonry & Landscaping has over a decade of experience building paver walkways, patios, and retaining walls across Morris and Somerset Counties, with the kind of site-specific knowledge that comes from working in New Jersey’s particular soil and climate conditions.

The team handles the full scope: grading, base preparation, paver installation, edge restraints, jointing, and drainage planning. Free estimates are available, and every project comes with a satisfaction guarantee.
Relevant services for walkway projects:
- Custom paver walkways (brick, concrete, natural stone, porcelain)
- Patio and outdoor living space design
- Retaining walls for sloped sites
For brick and stone masonry work across NJ, explore Fernandez & Sons’ summer masonry services or visit the Morris County hardscaping service page to request a free estimate.
Sources
The sources below cover how-to instructions, build specifications, and visual inspiration for paver walkway projects at every skill level.
- How to Design and Build a Paver Walkway
- How to Build a Paver Path
- How to Build a Concrete Paver Walkway – This Old House
- HGTV’s Top 40 Ideas for Creating the Perfect Pathway in Your Yard
- 27 Pavers Walkway Ideas You’ll Copy Before Even Finishing the Scroll
- Top 30 Walkway Paver Ideas – Modern and Natural Designs