
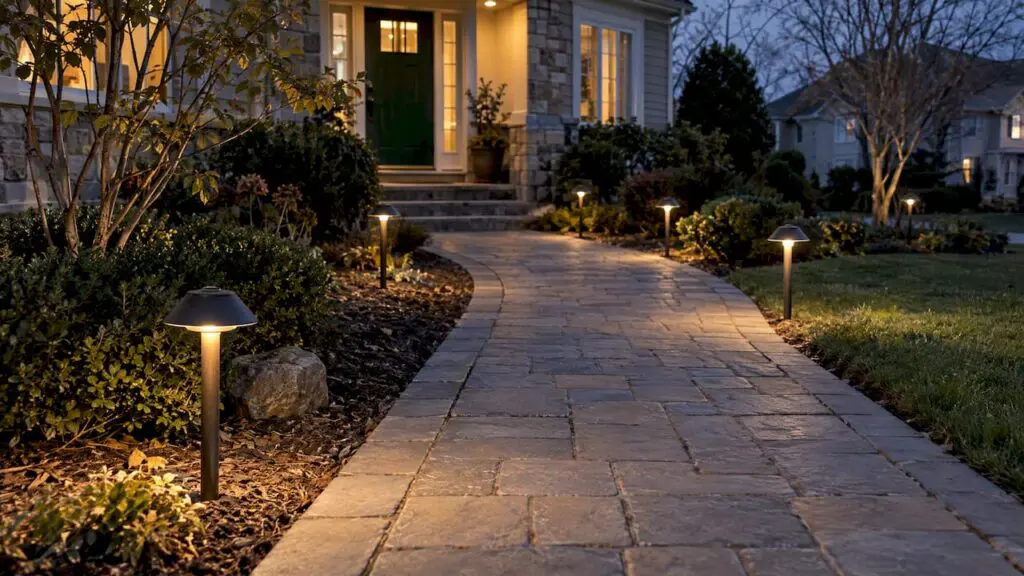
For most residential walkways, path lights work best about 6 to 10 feet apart, close enough that the pools of light on the ground just meet or overlap, and far enough apart that the walk does not look like a runway. The exact number depends on the fixture, the path surface, and what else is lit nearby. If you are planning a new walkway, patio, or driveway in Morris or Somerset County, the best time to settle spacing is before the stone goes down.
This guide explains how to choose spacing for your own path, why a single rule never fits every yard, how LED compares with halogen, and what to check before a fixture goes into the ground.
Quick Answers to Path Lighting
-
Start with 6 to 10 feet between path lights on a typical home walkway, then adjust for beam width, fixture height, and path material.
-
Tighter spacing (about 4 to 6 feet) suits curves, steps, and narrow garden paths. Wider spacing suits straight, open runs with other light sources nearby.
-
The 2023 lighting standard for landscape work does not set one universal distance, so a nighttime test with the actual fixtures beats any chart.
-
LED is the practical choice today: it uses far less energy than halogen and lasts much longer.
-
Plan lighting together with the walkway, steps, and patio so wiring and fixture locations are built in, not cut in later.
The Short Answer on How Far Apart Path Lights Should Be
Published guides vary. Many landscape lighting resources land somewhere between 6 and 12 feet, and a few fixture makers suggest much tighter layouts for specific products. That spread is the clue that spacing is a result, not a rule. The 2023 ANSI/IES RP-47-23 recommended practice for landscape lighting is summarized as having no single universal path light distance. Spacing is driven by site factors such as the fixture’s photometric performance, local light pollution rules, and how reflective the path surface is.
In practice, three things decide your number:
-
How wide and how bright the beam is. A fixture that throws a wide, soft pool can sit farther from its neighbor than one with a narrow, tight pattern.
-
How high the fixture sits. A taller fixture spreads light over a larger area of ground. A low one makes smaller, brighter pools.
-
What the path is made of. Light-colored pavers or bluestone reflect more light than dark pavement or mulch, so the same fixture can cover more distance on a pale surface.
That is why the manufacturer’s own path light spacing calculator from FX Luminaire asks for a target light level and layout style. Its page explains that the uniformity you want controls how much the beams overlap, and therefore how many fixtures you need.
Spacing Ranges by Type of Path
Use the table below as a starting point for a conversation and a test layout, not as a final plan. The ranges reflect common practice across published guides and are not a code requirement in New Jersey.
| Path Type | Typical Starting Spacing | Why |
|---|---|---|
| Straight front walkway, 4 to 5 feet wide | 6 to 10 feet | Overlapping pools give an even, welcoming glow |
| Curving garden path | 4 to 8 feet, staggered | Curves hide light from view, so more fixtures are needed to show the bend |
| Narrow stepping-stone path | 5 to 8 feet | Low beams need to land on each stone, not between them |
| Driveway edge or long approach | 8 to 15 feet | Wider spacing works when headlights and house lights add to the glow |
| Patio perimeter | 6 to 10 feet | Keeps edges visible without turning the patio into a parking lot |
| Steps and landings | Light every change in level | Safety matters more than symmetry here |
Staggered Versus Symmetrical Layouts
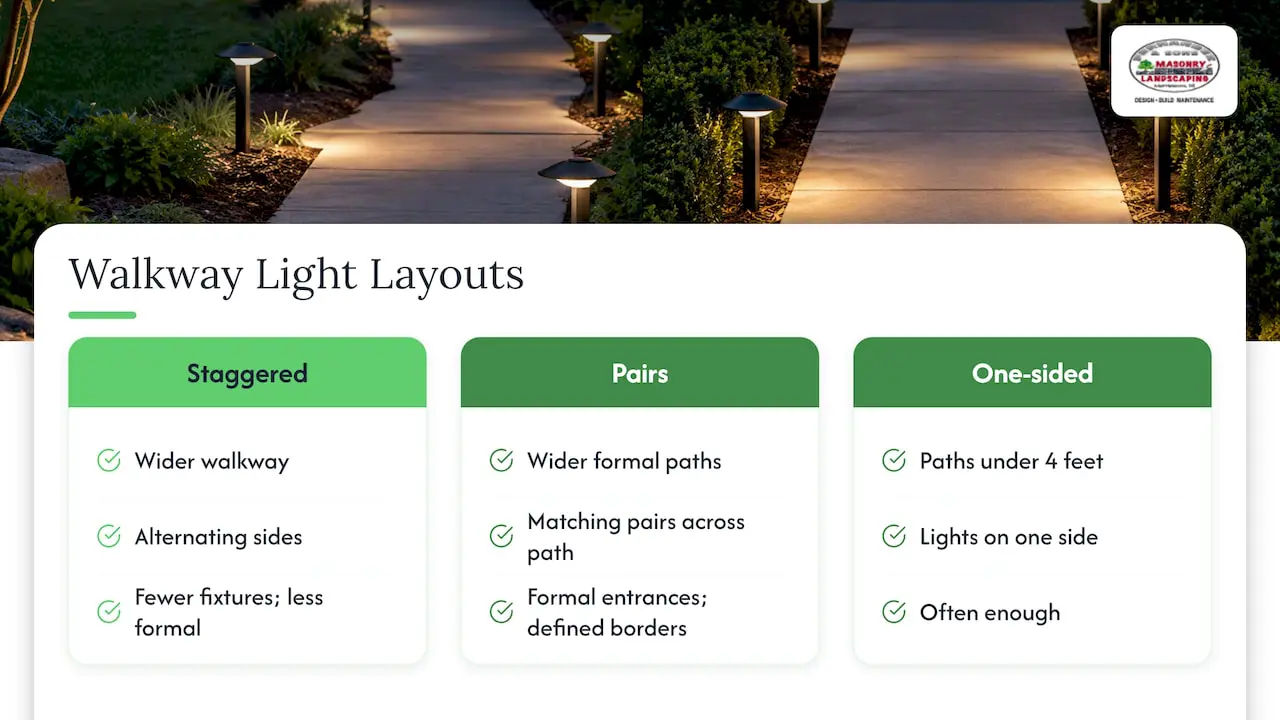
On a wider walkway, you can place fixtures on alternating sides, which is called staggering, or in matching pairs across from each other. Staggering usually lets you use fewer fixtures and feels less formal. Pairs suit formal entrances, symmetrical facades, and brick or stone walkways with a defined border. On a path under about 4 feet wide, lights on one side are often enough.
Why Curves Need Extra Attention
A straight run is forgiving. A curve is not, because the fixture on the inside of a bend can leave the outside edge dark, and the fixture on the outside can glare into the eyes of someone coming around the corner. Place lights on the outside of the curve when you can, and tighten the spacing so each bend is visible from the previous fixture.
Brighter Is Not Safer
Homeowners often add fixtures when a path feels dim, then end up with a harsh row of bright spots. Lighting professionals warn against that approach. The IES publication on designing quality lighting for people in outdoor environments says that brightness alone is inadequate for a complete visual experience, and the concern is practical: glare makes it harder to see beyond the lit patch, so the surrounding darkness feels less secure.
A better target is a modest, even level of light on the walking surface. For general pedestrian paths, a University of Michigan exterior lighting design guide points to an average maintained level of about 0.5 footcandles on the pavement, with the brightest spot no more than about five times the dimmest. You do not need a light meter at home, but the idea is useful: no black gaps, no hot spots.
A few habits keep glare down:
-
Choose shielded fixtures that direct light downward and hide the bulb from eye level.
-
Pick a warm color temperature. Guidance summarized from the RP-47-23 standard suggests 2700K or lower where you want to protect night vision and limit discomfort glare.
-
Aim and shield before you add more fixtures. Glare is more often an aiming or fixture-choice problem than an output problem.
The National Park Service’s outdoor lighting principles start with a question worth asking at home too: does this spot need a light at all? Skipping one fixture on a bright, open stretch of walkway often improves the whole layout.
LED vs Halogen Path Lights
Halogen was the standard for low-voltage landscape lighting for years. Today, LED has largely replaced it for walkways, and the reasons are practical rather than trendy.
| Factor | LED | Halogen |
|---|---|---|
| Energy use | Much lower for the same visible light | Higher, and it produces more heat |
| Bulb life | Very long, so fewer replacements | Shorter, so more frequent changes |
| Transformer size | Smaller load, so more fixtures per run | Larger load, so fewer fixtures per run |
| Light color | Available in warm tones such as 2700K | Naturally warm, but not adjustable |
| Heat at the fixture | Low | High enough to scorch nearby plants |
The U.S. Department of Energy’s building lighting upgrade guide says LEDs may use at least 75% less energy and last 25 times longer than incandescent lighting. Halogen is a type of incandescent bulb, so that comparison applies in spirit, though your actual savings depend on the products you compare.
How does this affect spacing? Not directly. Spacing comes from the beam pattern and height, not the bulb technology. Where LED does matter is the electrical design. Because LED fixtures draw less power, one transformer can serve a longer run, and you can add a fixture later without overloading the system. If you are replacing old halogen fixtures on an existing walkway, it is worth re-checking spacing, because LED beam patterns often differ from the halogen ones they replace.
Run a Nighttime Test Before You Dig
The most useful step in any path lighting plan is also the one most often skipped: look at the property after dark. Professional guidance summarized from the RP-47-23 standard recommends a nighttime site survey before equipment is chosen, so you can see dark spots, competing light sources, and how plants and structures interact with the planned layout. A guide to dark sky outdoor lighting for homeowners walks through a similar survey-first approach.
Here is a simple version you can use at home:
-
Walk the route at night with the porch and street lights as they normally are. Note where you hesitate or look down.
-
Mark every change in level, such as steps, thresholds, and the edge of a patio or retaining wall.
-
Place temporary lights. Flashlights, stake lights, or the actual fixtures on a temporary connection can stand in at your first spacing guess.
-
Check from three viewpoints: walking the path, looking out from inside the house, and approaching from the street.
-
Adjust, then flag. Move fixtures until the path reads as a continuous trail of light, then mark each final location with a stake or flag.
The IES RP-47 listing on GlobalSpec describes the standard’s coverage of how to light pathways, steps, trees, and structures, which is why on-site flagging against real conditions is part of professional practice.
Why Wiring and Voltage Matter as Much as Spacing
A layout that looks right on paper can fail when the lights are turned on. Low-voltage systems lose voltage along the cable, so fixtures at the end of a long run can look dimmer than those near the transformer. Design guidance summarized from RP-47-23 says the last fixture in a run should still receive at least 90% of its rated voltage, and that professional systems often leave about 20% of transformer capacity free for future additions.
This is also where hardscape planning pays off. Cable and conduit are far easier to place before pavers, concrete, or a retaining wall go in. That summary of RP-47-23 also mentions leaving empty conduit paths for future expansion or repair. If a trench for lighting crosses a walkway, sleeves set under the base mean you never have to cut finished stone later.
How Fernandez & Sons Looks at Path Lighting
We build walkways, patios, steps, driveways, and retaining walls across Morris and Somerset Counties, and we see the same pattern on many properties: the lighting question comes up after the stone is down. At that point, fixtures end up wherever there is a gap in the planting bed, not where the path needs them.
Our view is that path light spacing belongs in the design conversation from the start, alongside the layout of the walkway itself. A few principles guide how we think about it:
-
The path shape sets the rhythm. A curved paver walk, a straight concrete approach, and a stepped garden path each call for a different pattern, and the material changes how much light bounces back.
-
Plan the route for wiring. Sleeves and clear routes are part of the construction sequence, not an afterthought.
-
Light the hazards first. Steps, landings, and transitions between surfaces come before decoration.
-
Keep it comfortable. The goal is an entry or garden path that feels welcoming to family and guests, not a brightly lit corridor.
If you want to read more before deciding, our guides on landscape lighting ideas that look custom-designed and questions NJ homeowners should ask before installing landscape lighting cover the planning side in more detail.
— Fernandez & Sons
Planning Lights Around Your Walkway, Steps, and Patio
Different hardscape features call for different thinking. Here is how spacing decisions tend to connect to the construction itself.
Walkways
A front walkway is the first thing guests see and the surface everyone uses in the dark, so it carries the most weight. Wide, light-colored pavers reflect more light, which can let you stretch spacing. Narrow or darker surfaces may need fixtures closer together. You can browse examples on our walkway projects page and see how borders, curves, and widths shape the route.
Steps
Steps are the one place we would not stretch spacing. Every change in level should be visible, either from a fixture beside the stair or from lighting built into the riser or wall. Our steps projects show how treads, landings, and side walls create natural spots for fixtures.
Driveways
Long driveways usually need wider spacing, because vehicle headlights and house lights share the work. Light the turns and the transition to the walkway rather than every few feet. See our driveway projects for different layouts and edge treatments.
Garden Paths and Patios
A garden path is about atmosphere as much as safety, so lower, softer pools of light often work better than bright ones. If you are still deciding on the route itself, our creative garden path ideas are a good starting point. For patios, edge lighting should guide people without competing with a fire pit or outdoor kitchen, which are the real focal points of the space.
Common Spacing Mistakes to Avoid
-
The runway effect. Evenly spaced fixtures at identical distances along both sides of a path look like an airstrip. Stagger them or use one side.
-
Gaps at the bends. The dark patch around a corner is where most missteps happen.
-
Too many bright spots. More fixtures at higher output create glare and uneven contrast.
-
Mixing color temperatures. Combining 2700K and 4000K fixtures on one route looks patchy.
-
Ignoring existing light. Porch lights, street lamps, and a neighbor’s floodlight all affect how much you need.
-
Planting-blind placement. A fixture that looks fine in February can be buried by perennials by July. Check the mature size of nearby plants.
Upgrading an Existing Path in Morris or Somerset County
If your walkway is already built, you can still improve the lighting. Start with the nighttime walk described above, then count the dark gaps. Often the fix is moving two or three fixtures, swapping halogen for LED, and adding shielding, not starting over.
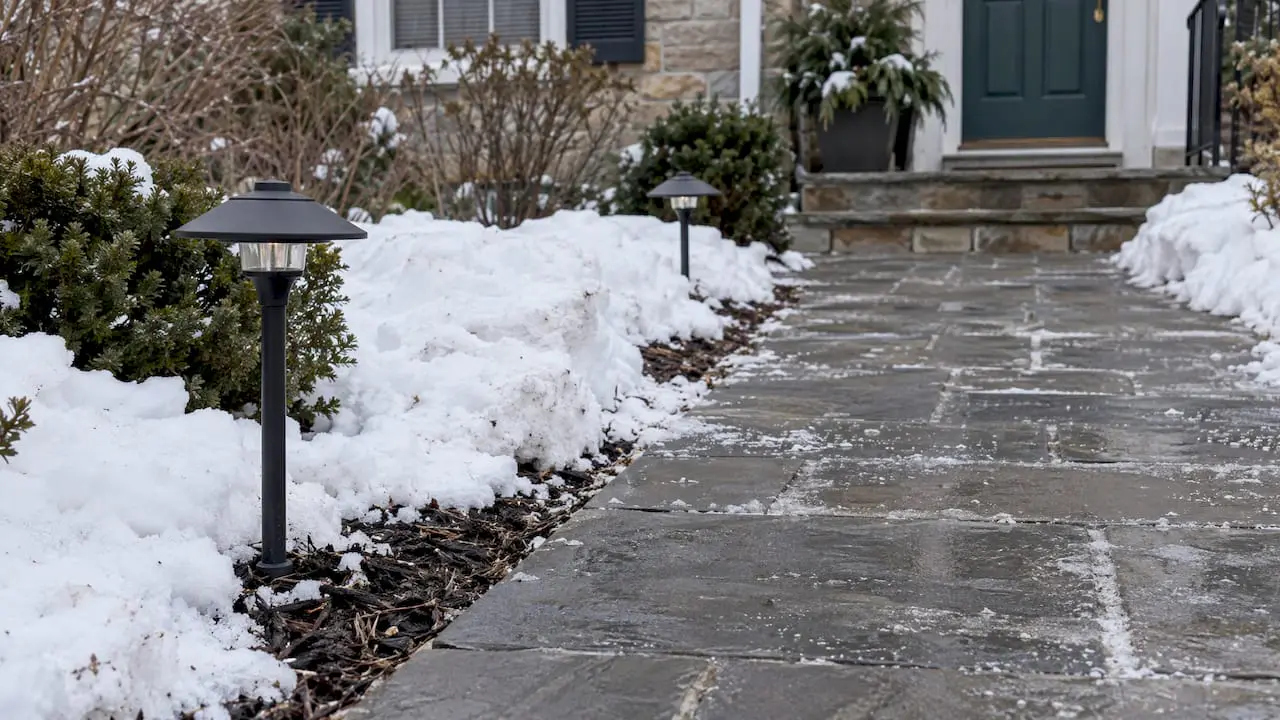
New Jersey winters add another factor. Fixtures near walkways can be hit by plow piles, shovels, and salt. Keep them back from the edge where snow gets stacked, and choose sturdy housings. If you are also planning seasonal service, our residential services page covers driveways and snow plowing, and it helps to tell your plow crew where fixtures and walkway edges are.
Plan Your Walkway and Outdoor Lighting Layout With Fernandez & Sons
If you are building or rebuilding a walkway, patio, steps, or driveway, we can plan the stonework, base, and routing so lighting fits cleanly later. We serve homeowners, businesses, and property managers across Morris and Somerset Counties. Estimates are free, and our work is backed by a satisfaction guarantee. Explore our landscape design services or start from our main site to see everything we offer.
Frequently Asked Questions About Path Light Spacing
How far apart should path lights be?
For most home walkways, 6 to 10 feet is a sensible starting range. Use tighter spacing on curves, steps, and narrow garden paths, and wider spacing on long straight runs with other light sources. Test the layout at night before you commit.
How many path lights do I need for a 30-foot walkway?
At 6 to 8 feet apart on one side, you would typically use four to six fixtures. A staggered layout on a wider path may use a similar count, and a curve may add one or two. Treat that as an estimate and confirm it with a nighttime test.
Are LED path lights better than halogen?
For most homeowners, yes. The U.S. Department of Energy’s guidance says LEDs may use at least 75% less energy than incandescent lighting and last far longer. LED also runs cooler, which is gentler on plants near the fixture.
Can I use the same spacing for a driveway and a walkway?
Usually not. Driveways benefit from wider spacing and focus on turns and entrances, since headlights and house lights share the load. Walkways need closer, more even spacing because people walk them slowly and at eye level with the fixture.
Should path lights be on one side or both sides?
On paths under about 4 feet wide, one side is often enough. On wider paths, staggering fixtures on both sides gives even coverage with fewer fixtures than matching pairs. Formal entrances may call for symmetrical pairs.