
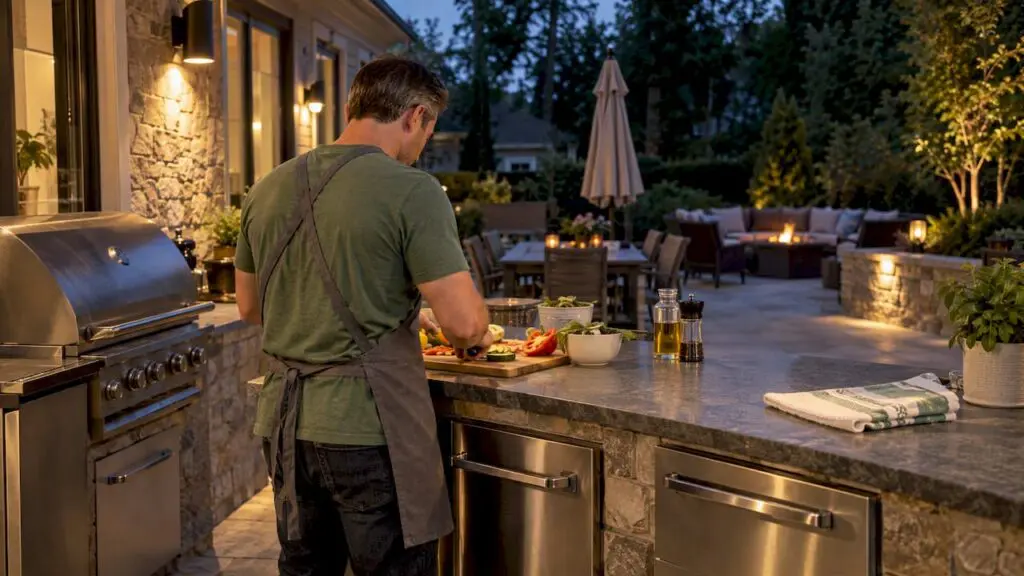
Good outdoor kitchen lighting layers task light over the grill and prep counters, ambient light for dining and walkways, and accent light for stone and landscaping, all in a warm 2700K–3000K tone with dimming where you can. Wet-rated fixtures belong near cooking and wash areas, outdoor receptacles need GFCI protection, and hardwired work should go to a qualified electrician.
Outdoor Kitchen Lighting Quick Answers
Hang island pendants 30–36 inches above the counter, space them 24–30 inches apart, and keep outer fixtures at least a foot from each end.
Installed lighting averages about $3,000, with typical projects costing $2,000–$4,000; outdoor kitchen electrical work starts near $500 and can exceed $1,500.
Low voltage suits path, step, and landscape lights, while line voltage powers pendants and fixtures beside grills; many kitchens combine both systems.
Budget for task fixtures and wiring before construction, because adding conduit after pavers or stonework are installed can require opening finished surfaces.
Test each GFCI monthly, then inspect fixture seals, mounts, and housings each spring for gaps, looseness, or corrosion as part of routine maintenance.
What should you plan before choosing outdoor kitchen lighting?
Before you shop for fixtures, decide which zones need light and what conditions each one faces. A fixture that looks perfect in a catalog can fail within two seasons if it sits where rain, grease and heat hit it every week.
Start by mapping the zones in your outdoor kitchen:
-
Grill or cooktop: the most demanding spot, because you need to see food color and doneness.
-
Prep counters: the place where you cut, season and plate, so shadows from your own body are the enemy.
-
Sink or wash area: wet by definition, so fixtures here need water protection suited to their exposure.
-
Island seating: guests need enough light to eat and talk comfortably, without a glare in their eyes.
-
Dining table: softer light that makes people and food look good.
-
Walkways and steps: safety lighting that keeps people from tripping when they carry plates.
-
Nearby landscape features: trees, stone walls and planting beds that give the space depth after dark.
Next, think about cover. A pergola with a solid roof or a covered patio ceiling protects fixtures from direct rain, so damp-rated fixtures can work there. Open-air islands, the sink area and anything that gets sprayed need wet-rated fixtures. Fixtures rated only for damp locations suit covered areas that do not see direct precipitation or water spray, so match the rating to the exposure, not to the price tag.
Mounting surfaces matter too. Fixture manufacturers ask for a clean, dry, flat surface that is sealed with caulk around the canopy for outdoor and wet locations. Rough stone veneer, textured walls and uneven pergola beams can make that harder, so you may need a flat mounting plate or a different fixture style. If you love textured wall lights for patios, check that the wall surface can accept a gasketed, sealed base.
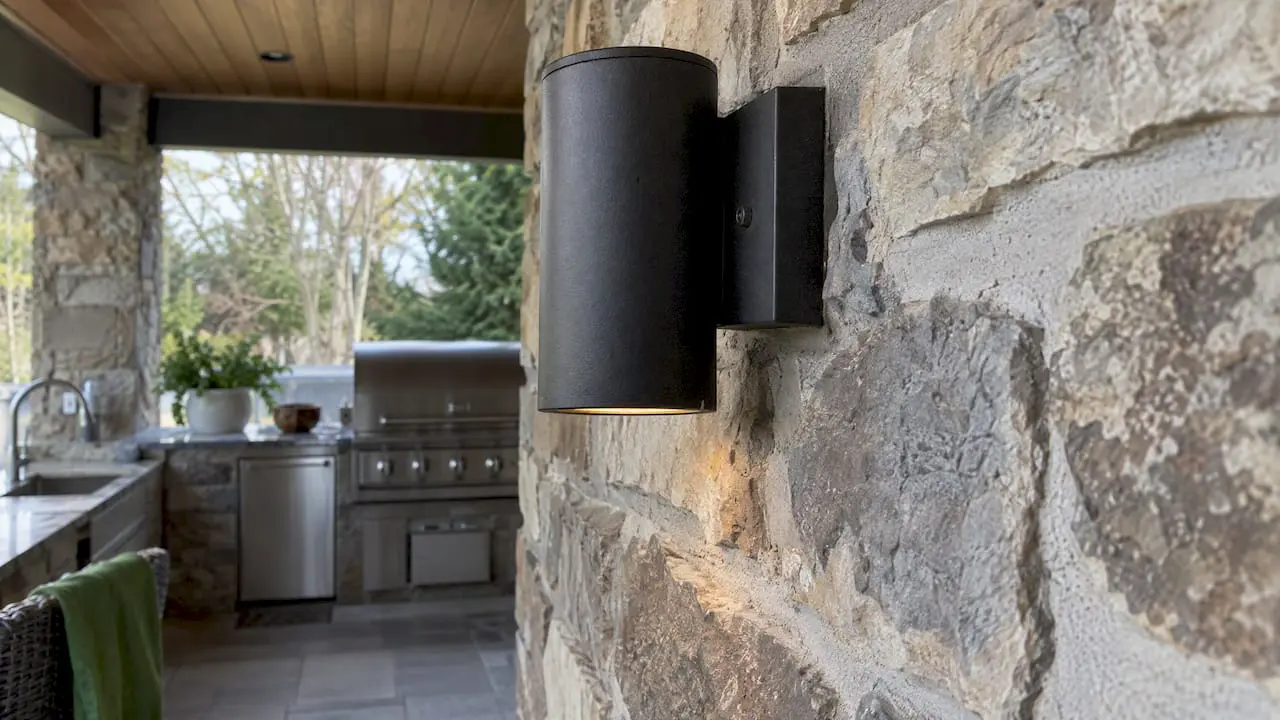
Electrical access shapes your budget more than most people expect. Think about how far the nearest panel is, whether wiring must run through conduit under pavers or along a wall, where a low-voltage transformer can live, and whether your town requires a permit for new circuits. A short call to your local building department early in planning saves rework later.
Use this pre-planning checklist before you talk to a designer or electrician:
-
Take site photos of the kitchen area, nearby walls, the pergola or roof, and the path to your electrical panel.
-
List your appliances (grill, side burner, refrigerator, pizza oven) and where each will sit.
-
Note how much of the space is covered and how much is open to weather.
-
Decide how you want to control the lights: switches, dimmers, timers or a phone app.
-
Collect a few style references, such as finishes, shapes and the overall mood you want.
If you want help thinking through appliance placement first, our outdoor kitchen layout guide walks through sizing and flow, which makes lighting decisions much easier.
How do task, ambient and accent lighting work together?
Layering is the idea that one bright source never does the job. Relying on a single strong light creates harsh shadows and glare, while three modest layers give you light where you work, comfort where you sit and depth where you look. Lighting designers describe those layers as task lighting for prep, ambient lighting for navigation and mood, and accent lighting for architectural or landscape depth.
Here is how each layer maps to an outdoor kitchen:
-
Task lighting sits close to active work surfaces. Think focused pendants over the island, under-counter strips on prep areas and a dedicated grill light. Its job is to let you see what you are cooking, so it should be brighter and well aimed, with the light source shielded from your eyes.
-
Ambient lighting fills the space with a gentle, even glow. Recessed lights in a soffit or pergola ceiling and overhead string lights are common choices. This layer keeps guests safe as they move around and keeps the area from feeling like a dark cave beyond the task lights.
-
Accent lighting adds depth and character. Uplights on a stone wall, small lights that wash a textured veneer and path or step lights make the whole yard feel designed rather than merely illuminated.
The practical order of operations is simple. Put your budget first into task light near the grill and counters, because that is where safety and cooking quality depend on it. Add ambient light next so the rest of the space is comfortable and safe to cross. Finish with accent light, which is the layer that makes the space look finished from inside the house and from the yard.
A good test at dusk: stand where the cook stands. If you can see the food clearly without squinting at a bare bulb, and you can still see guests and steps without bright spots in your eyes, your layers are balanced. If your own shadow falls across the cutting board, move or add a task source.
Which fixture types work best in an outdoor kitchen?
Most outdoor kitchens end up with a mix of fixture types, each matched to a zone. Here is a catalog of what works and where.
-
Pendants and ceiling fixtures: These suit covered islands and pergolas, where they provide focused task light and a strong design statement. Hang them low enough to light the counter but high enough that seated guests can see across the island. Choose a pendant height suited to your ceiling and fixture size, while keeping the counter well lit and sightlines clear. Under a roof, damp-rated pendants can work; anywhere rain can reach, choose wet-rated.
-
Recessed downlights: These sit flush in soffits and pergola ceilings and deliver even ambient light with no visible fixture hardware. Pick low-glare optics and look at the BUG rating (Backlight, Uplight, Glare). Lighting professionals suggest preferring fixtures with minimal backlight, uplight and glare, such as B0 or G0 ratings, to keep light where you want it.
-
Under-cabinet, strip and puck lighting: These are the workhorses for countertops and toe-kicks. Waterproof aluminum channels with LED strips give consistent task light along the whole counter. Put the strip toward the front edge of the cabinet or shelf, so it lights the work surface instead of the backsplash.
-
Hardscape and in-ground lights: Use these for steps, pathways, and to highlight stonework. Look for corrosion-resistant housings and appropriate impact and water ratings, since they take foot traffic, lawn equipment and sprinklers.
-
String and rope lights: Easy to install and great for mood, they are less durable than hardwired fixtures. Mount them on a taut support wire, space the support points so the strand does not sag, and plan to take them down or replace them more often.
-
Dedicated grill lights and heat-tolerant task lamps: Mount these on a fixed point beside or above the grill with a clear gap from the hood and smoke path. Check the manufacturer’s temperature rating, and keep fixtures out of the zone where heat and grease rise. Recessed luminaires near cooking equipment should meet temperature and spacing guidelines, so follow the fixture labeling and your electrician’s direction.
Materials and finishes matter as much as shape. In exposed or humid settings, favor marine-grade or 316 stainless steel, solid brass, or powder-coated aluminum housings. Cheap plated finishes can pit and peel within a season, especially near a pool or in areas that get salt from winter road spray.
Pro Tip: Buy one extra fixture of each type and keep it in the garage with the receipts. Finishes and LED modules change from year to year, and a matching spare makes repairs painless.
If you are building from scratch, it helps to see how lighting fits into a finished design. Our outdoor kitchen design ideas page shows how fixtures sit alongside grills, counters and seating, and our outdoor living projects gallery shows lighting working with patios and stonework.
You can also use outdoor lighting ideas from other parts of your yard to tie the space together. If your plan includes a pool, pool lighting design options are worth a look so the water glow and kitchen light do not compete with each other.
What do wet ratings, GFCIs and wiring mean for your lights?
Outdoor lighting safety comes down to three things: the right water protection, the right shock protection and the right wiring approach. Getting these right matters more than any style choice.
Water ratings. Ingress Protection (IP) ratings describe how well a fixture keeps out dust and water. According to UL’s explainer, IP ratings define protection against water, from IPX4 splash and IPX5 water jets to IPX6 powerful water jets and IPX7 immersion, while IK ratings describe impact protection. For the zones that matter most in a kitchen, outdoor fixtures near cooking or wash areas should be rated for wet locations, with IP65 or IP67 as the practical guide. Look for these markings on the box or spec sheet, not just the words “outdoor rated” in a product title.
Shock protection. Outdoor outlets that power string lights, small appliances or plug-in fixtures need ground-fault protection. All outdoor receptacles must be protected by GFCIs to prevent electrocution risks. Test them regularly, since the NFPA’s safety tips recommend testing GFCIs and AFCIs monthly according to manufacturer instructions.
Fire and qualified labor. Kitchens are a high-risk area for electrical trouble. The NFPA notes that kitchens are high-risk for electrical fires and recommends that outdoor electrical work be done by qualified electricians. It also tells homeowners to watch for warning signs such as flickering lights, warm outlets or a tingling feeling when touching appliances.
Here are the main points to confirm with your electrician and your fixture specs:
-
Every fixture near the grill, sink or open sky is wet-rated, and fixtures under solid cover are at least damp-rated.
-
Ask your electrician to explain the protection provided at outdoor receptacles and how to respond if it trips.
-
Wiring is run in the right conduit and burial depth for your local code.
-
Fixtures are grounded and sealed per the manufacturer’s instructions, including gaskets and caulk. Installation guides stress disconnecting power before servicing and wiring to the National Electrical Code and local codes.
-
Permits and inspections are handled before the walls and pavers are closed up.
Low voltage versus line voltage. Low-voltage systems use a transformer to step household current down. They are generally easier to run in landscape beds and safer to touch if a wire is nicked, and they work well for path lights, uplights, step lights and some strip lights. Line-voltage systems feed pendants, recessed lights and grill-side fixtures, but they need conduit, proper boxes and wiring handled by a qualified electrician. Many outdoor kitchens use both: line voltage for the cooking area and low voltage for the landscape layer. Size the transformer for the total fixture load plus some headroom, and place it where you can reach it and where it stays dry.
Light trespass. Good lighting stays where you put it. The Illuminating Engineering Society’s five principles for responsible outdoor lighting call for light that is useful, targeted, low in level, controlled and appropriate in color, and the IES points to BUG ratings and lighting zones as tools to limit light trespass and sky glow. In practice, that means shielded fixtures aimed down and no bright beams crossing into a neighbor’s window.
Safety note: Hardwired outdoor circuits are not a weekend guess-and-check project. Hire a qualified electrician, confirm permit requirements with your town, and test every GFCI after the install.
How should you choose color temperature, dimming and controls?
For a residential outdoor kitchen, stick with warm light. Experts recommend 2700K or 3000K for residential outdoor spaces because it mimics evening light, flatters food and skin tones, and reduces the circadian disruption of blue-heavy sources. Sustainable lighting designers echo this. A design discussion hosted by the IES recommends low color temperatures, preferably 2700K in residential areas, and adjusting dimming and color across the day to mimic natural light.
Keep color temperature consistent across every fixture you buy. Mixing 2700K pendants with 4000K strip lights makes the space look patchy, and cooler light can make steak look gray and guests look tired.
Dimming turns a good kitchen into a flexible one. A few practical points:
-
Check driver compatibility. LED fixtures need a compatible dimmer. A mismatch can cause flicker or buzzing, so match the dimmer type to the fixture or driver.
-
Set scenes. Full brightness at the counters while you cook, a lower setting for dining, and a soft glow for late conversation.
-
Dim after dinner. Reducing brightness later in the evening saves energy and is kinder to neighbors and local wildlife.
Smart controls add convenience: timers that switch the landscape layer on at dusk, app control that lets you set scenes from your phone, and voice assistant integration for hands-free control while your hands are covered in marinade. A timer or motion sensor on path lights also reduces wasted light. If you want to explore integrated control options, this guide to integrated lighting controls explains how a dimming and scene setup comes together.
Keep light targeted. The IES guidance on responsible outdoor light supports controlled use, meaning light on only when and where you need it, and shielded fixtures aimed at the task.
Pro Tip: Put the task layer, the ambient layer and the accent layer on three separate switches or control channels. Then you can run just the accent layer for a quiet evening without lighting up the whole yard.
Where should you place pendants, downlights and strip lights?
Placement is where good fixtures either shine or glare. These heuristics apply to most residential islands and counters, though your exact layout and fixture style may shift them.
-
Space pendants evenly over the island. Hang the bottom of each pendant about 30 to 36 inches above the counter. For spacing, a common guide is to leave roughly 24 to 30 inches between fixtures and to keep the outer pendants a foot or more in from each end of the island so the group looks balanced. Wide fixtures need more room, small ones can sit closer.
-
Aim downlights to overlap, not to spotlight. In a soffit or pergola ceiling, space recessed lights so their beams overlap on the floor or counter, which prevents dark pockets between fixtures. Keep them a short distance in from the front edge so light falls onto the work surface and not straight into people’s eyes. Choose fixtures with a deep baffle or a recessed lens to cut glare.
-
Light countertops from the front edge. Mount under-cabinet or shelf strips toward the front so the beam hits the counter instead of the back wall. Use a continuous run rather than spaced pucks when you can, which avoids bright scallops and dark gaps on a polished or textured surface.
-
Keep task light out of your own shadow. If the cook faces the counter, light from above and in front is better than light from behind. Add a second source on the other side if one lamp leaves a shadow.
-
Keep landscape beams from competing. Uplights and path lights should support circulation, not fight with the kitchen. Point uplights at a wall or tree instead of toward seating, and shield path lights so you see the ground, not the bulb. The IES says light should be useful, targeted and controlled, which is a good rule for every fixture on this list.
-
Test at night before finalizing. Temporary clamp lights or a loaner fixture will show you hotspots and glare before you drill or cut.
If you want to see how these placement ideas look in a finished layout, our outdoor kitchen design ideas page shows grills, counters and seating arranged as a complete space.
What does outdoor kitchen lighting cost?
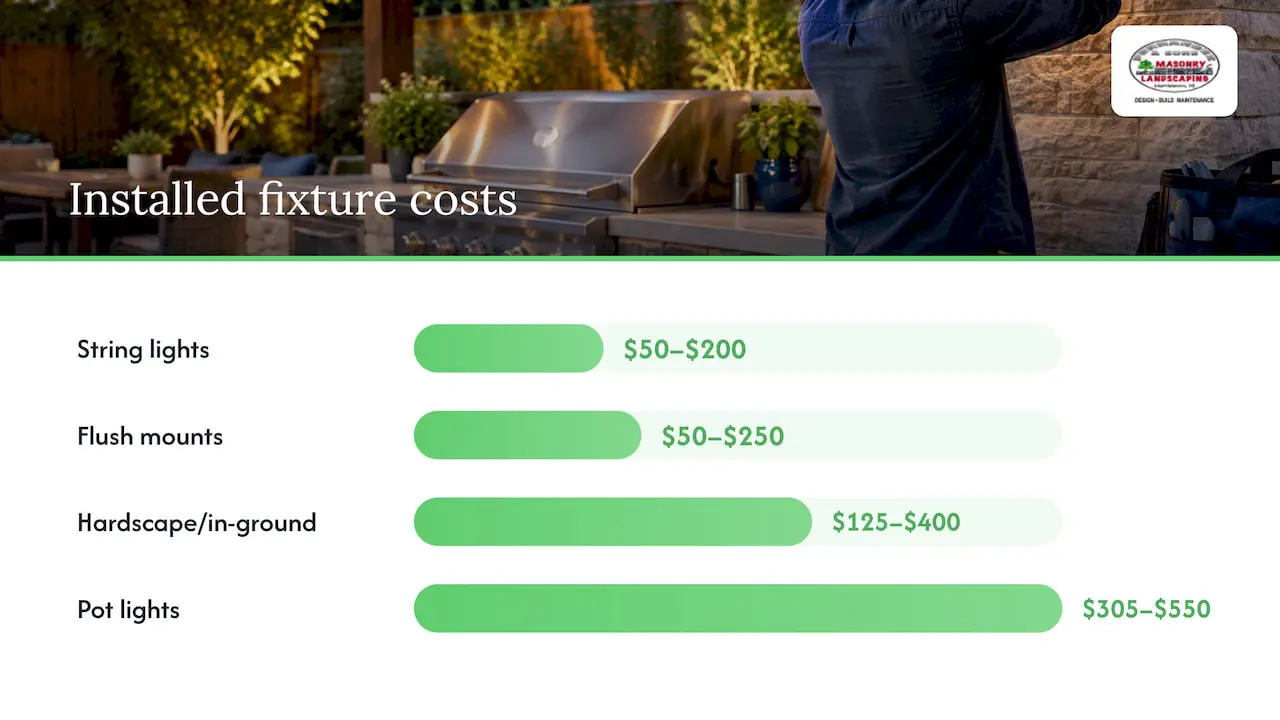
Costs vary with fixture type, distance to the panel and local labor, so treat any figure as a starting point for your own quotes. For installed lighting, Fixr reports a national average of about $3,000, with typical installed ranges of $2,000–$4,000. Per-fixture installed costs vary by type: string lights run roughly $50–$200, flush mounts $50–$250, hardscape or in-ground lights $125–$400, and pot lights $305–$550.
For the electrical side of a kitchen, Fixr puts the baseline for running electrical lines to an outdoor kitchen at about $500, with larger kitchens needing $1,500 or more for full electrical work and permits. Per-fixture installation commonly adds $50–$100 on top. For a wider look at the whole project, see our outdoor kitchen cost guide, which covers permits and planning.
Several things push the price up or down:
-
Distance to the panel: longer runs mean more wire, conduit and labor.
-
Permits and inspections: fees vary by town and by whether you need a new circuit.
-
New circuits or trenching: digging through pavers, patios or stone is more expensive than running wire through an open bed.
-
Transformer sizing: a larger low-voltage system needs a bigger or additional transformer.
-
Fixture grade: marine-grade stainless or solid brass costs more than coated aluminum but lasts longer in harsh conditions.
-
Controls: smart dimmers, timers and scene controllers add upfront cost but can pay back in convenience.
Solar and plug-in fixtures sit at the low end. They make sense for accent lighting, temporary spaces or places where trenching is impractical. The trade-off is lower and less consistent output, batteries or panels that need cleaning and replacing, and shorter lifespans than hardwired fixtures. For task light at a grill or prep counter, a wired, wet-rated fixture is almost always the better investment.
A smart budget approach: spend on the wiring and the task layer first, since those are hard to change later, and add accent and decorative fixtures in phases.
What should you check before and after installation?
A good installation starts with a clear plan and ends with testing. Use this list to keep the project on track.
-
Have your planning materials ready. Site photos, an appliance list, preferred fixtures and color temperature, control preferences and a budget range help any contractor quote accurately.
-
Ask about permits. Find out who pulls them, who schedules inspections and whether sign-off is documented.
-
Confirm GFCI protection. Ask whether every outdoor outlet and circuit will be GFCI-protected, in line with the guidance that all outdoor receptacles be GFCI-protected.
-
Ask about transformer sizing. For low-voltage systems, ask how the transformer is sized and where it will be mounted.
-
Verify licensing. Request proof that the person doing hardwired work is a licensed electrician.
-
Get warranty terms in writing. Ask separately about labor and fixtures.
-
After install, test everything. Trip and reset each GFCI, run every dimmer scene from low to high, check for flicker, and inspect seals, gaskets and caulk for gaps.
-
Keep the paperwork. File the permit sign-off, fixture specs and warranty cards where you can find them.
Plan to retest GFCIs monthly, as the NFPA’s electrical safety tips suggest, and look over fixtures each spring for cracked seals, loose mounts and corrosion.
What do real outdoor kitchen lighting setups look like?
Three sample setups can help you anchor your own plan. Costs are rough and depend on your site, so use them to frame a conversation with a pro.
-
Small footprint: pergola-covered island. Use wet-rated pendants over the island for task light, an LED strip under the counter lip, and string lights along a pergola beam for ambient glow. Power can come from a single GFCI-protected circuit. This setup suits a modest budget, and the install is usually the lightest of the three.
-
Mid-size: open-air island with a built-in grill. Because there is no roof, choose wet-rated fixtures throughout. Swap pendants for post-mounted or wall-mounted task lights, add a dedicated grill light on a fixed bracket away from the smoke path, and use low-voltage step lights for circulation. A mix of line-voltage task fixtures and a low-voltage landscape layer works well here.
-
Full build: dining plus landscape. Layer recessed lights in the soffit over the cooking zone, pendants over the island, string lights over the dining table, uplights on stone walls and path lights along the walkway. Put the layers on separate control channels with scene presets, and consider smart control for dimming and timers. This is the most involved plan, and it benefits from a lighting layout drawn up before construction begins.
Looking for more ways to tie lighting into a wider outdoor plan? Our outdoor living spaces page shows fire pits, seating and backyard design ideas that pair well with kitchen lighting.
From Fernandez & Sons: what we see in real installs
We build outdoor kitchens, patios and outdoor living spaces across Morris and Somerset Counties, and lighting is almost always part of the conversation. Two lessons come up again and again.
First, durability beats novelty. Homeowners are often tempted by a decorative fixture that looks great in the showroom, but exposure to rain, humidity, winter freeze-thaw cycles and road salt is what separates a fixture that lasts from one that rusts by the second summer. We steer clients toward wet-rated housings with solid finishes in the places that take the most abuse, and we leave the delicate decorative pieces for covered spots.
Second, wiring decisions made early save money later. It is far cheaper to run conduit before pavers and veneer go in than to open finished stonework afterward. Clients who plan their lighting layers during design end up with cleaner results, fewer visible wires and more flexible controls.
The usual trade-off we see is budget. Many homeowners put most of their money into the grill and counters, then squeeze lighting at the end. We encourage setting aside a lighting and electrical line from the start, even if you phase some fixtures in later.
If you want a professional eye on your plan, we offer free estimates and stand behind our work with a satisfaction guarantee.
— BG
How can we help with design, wiring and installation?
If you would rather have a professional handle the project, we can help with outdoor kitchen construction and landscape coordination.

Here is what you can expect from a consultation with our team:
-
A site visit to look at your space, appliances and how you use the yard.
-
A wiring assessment that covers panel access, conduit routes and transformer placement.
-
Fixture recommendations matched to your zones, exposure and budget.
-
A written quote so you can compare scope and cost clearly.
We pair kitchen construction with the masonry and hardscaping that surround it, so your lighting, stonework and landscape feel like one design. To see the range of what we do, visit our services, or browse our landscaping and design services if you want the whole yard planned together.
Ready for the next step? Request a free estimate and we will schedule a site visit.
FAQ
What color temperature is best for outdoor kitchen lighting?
Warm light in the 2700K to 3000K range works best for most residential outdoor kitchens. Experts recommend this range because it flatters food and skin tones and reduces circadian disruption. Keep every fixture the same color temperature for a consistent look.
Do outdoor kitchen lights need to be waterproof?
Fixtures near the grill, sink or open sky should be wet-rated, with IP65 or IP67 as a practical guide. Fixtures under solid cover can be damp-rated, since they are not exposed to direct rain or spray. Check the rating on the spec sheet, not just the word “outdoor.”
Do outdoor outlets need GFCI protection?
Yes. Outdoor receptacles must be protected by GFCIs to reduce the risk of electrocution. Test them regularly and have a qualified electrician handle any hardwired work.
Should I choose low-voltage or line-voltage lighting?
Many kitchens use both. Low-voltage systems suit path, step and accent lighting and are simpler to run in landscape beds, while line-voltage systems handle brighter pendants, recessed lights and grill-side task fixtures. A qualified electrician can size the transformer and wiring for your layout.
Can I use string lights as my only outdoor kitchen lighting?
String lights add great mood, but they rarely give enough focused light for cooking and food prep. Pair them with task lighting at the grill and counters so you can see what you are doing safely.