
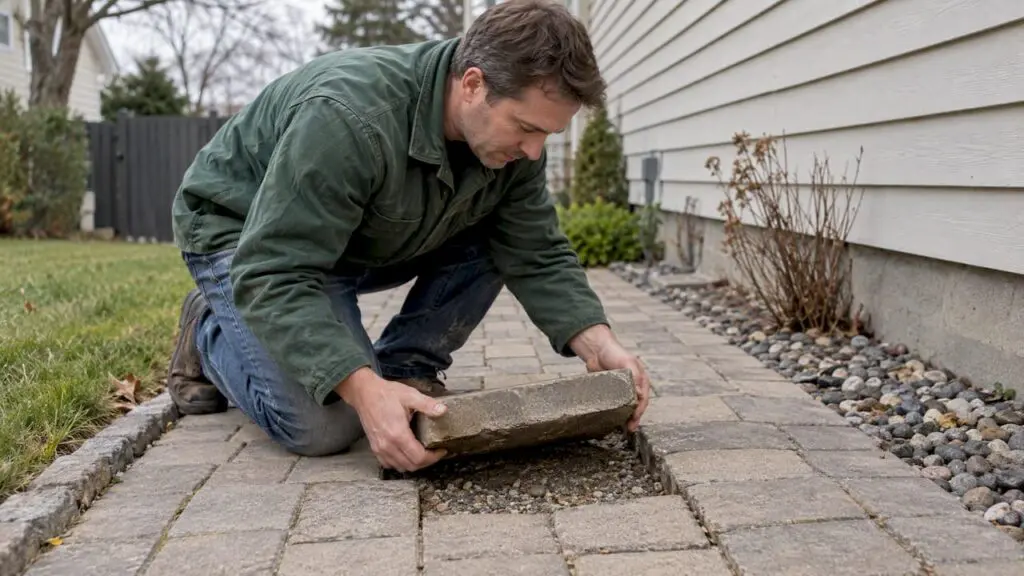
Lift the affected pavers, repair the base, and re-lay and compact. Small, isolated depressions may be DIYable with the right tools, but structural sinking or drainage failure calls for professional base remediation. Industry guidance from ICPI backs this approach, and patio repairs typically run $726 to $2,485 depending on the extent of the damage.
TL;DR:
- A repeat dip, standing water, or washed out aggregate signals drainage or subgrade failure; hire a professional instead of patching the surface.
- For isolated repairs, lift two rows beyond the dip, compact the base in layers, and use a plate compactor rated at 5,000 lbf or higher.
- Patio repairs typically cost $726 to $2,485; paver work tends toward the upper end when crews must rebuild the base or correct drainage.
- Keep water away by grading surfaces away from the home and extending downspouts; refill lost joint sand and check for pooling each spring and fall.
Table of Contents
- Why Pavers Sink: Base, Drainage, Soil, and Weather
- How to Tell Whether to DIY or Hire a Professional
- Tools and Materials for a Lift-and-Relay Repair
- How to Repair Sunken Pavers Step by Step
- What It Costs to Fix Sunken Pavers
- How to Prevent Pavers From Sinking Again
- What We See Most Often in the Field
- How Fernandez & Sons Can Rebuild Your Pavers for Good
- FAQ
- Sources
Why Pavers Sink: Base, Drainage, Soil, and Weather
Sunken pavers are a symptom, not the problem itself. What you see on the surface almost always traces back to something happening underneath, and figuring out which cause applies to your patio or walkway determines whether a surface repair will actually hold.
The most common culprit is inadequate base compaction. When the crushed stone layer under your pavers wasn’t compacted properly during installation, it settles under the weight of foot traffic, furniture, and weather over time. According to ICPI, aggregate does not compact itself. A base that looked solid on installation day can still shift and settle for years afterward if it wasn’t mechanically compacted in the first place.
Water compounds nearly every other cause. Poor drainage lets water pool against or underneath the paved surface, eroding the base material and washing fines out from between the stones. Joint sand infiltration, where sand migrates downward through gaps instead of staying locked in place, opens the door for the same erosion.
Beyond compaction and water, a handful of other factors contribute:
- Edge restraint failure, which lets pavers spread and lose the lateral support that keeps the whole field locked together
- Tree roots growing underneath the paved area and displacing the base
- Frost heave in regions with freeze-thaw cycles, which pushes soil and base material unevenly
- Repeated heavy traffic loads, such as vehicles parked on a patio or walkway not designed for that weight
A field test from ICPI distinguishes compaction (mechanical removal of air voids) from settlement (long-term soil movement). Knowing which one you’re dealing with changes the repair: compaction problems respond to a proper lift-and-relay, while ongoing settlement from unstable subgrade soil often needs a deeper fix.
How to Tell Whether to DIY or Hire a Professional
Before you grab a shovel, run through a short checklist. The answers tell you whether this is a weekend project or a job for someone with base remediation equipment.
- Measure the affected area. A depression a few square feet across is generally manageable yourself; anything spanning a large section of patio or walkway points toward a bigger base issue.
- Check the depth. A shallow dip you can barely notice with your foot is different from a depression deep enough to catch a stroller wheel or collect standing water.
- Look for repeat offenders. If you’ve already patched this same spot once and it sank again, the underlying base or drainage problem wasn’t actually fixed.
- Inspect for erosion. Pull up one paver at the edge of the sunken area; if the base underneath looks washed out, soft, or missing entirely, water is moving through there regularly.
- Watch for pooling water. Standing water after rain anywhere near the sunken spot signals a drainage failure that a surface patch won’t resolve.
When any of these point to drainage failure or unstable subgrade soil, professional remediation becomes the more reliable choice. Contractors carry plate compactors rated for proper density and, in some cases, compaction testing equipment that confirms the base meets spec before pavers go back down. That level of verification is hard to replicate with a rented tamper and a Saturday afternoon. For a deeper look at this decision, our guide on DIY versus hiring a contractor for paver patios walks through the tradeoffs in more detail.
Tools and Materials for a Lift-and-Relay Repair
A proper repair depends on having the right equipment on hand before you start pulling pavers. Running out of base material or discovering your tamper isn’t heavy enough midway through the job slows everything down.
For tools, you’ll want:
- Flat pry bars and paver alignment bars to lift pavers without chipping the edges
- A rubber mallet for seating pavers back into place
- A square shovel and stiff broom for removing old bedding sand and debris
- A plate compactor rated at 5,000 lbf or higher, which CMHA technical guidance identifies as the minimum effective spec for seating pavers and compacting bedding material
- A hand tamper as a backup for tight spots the plate compactor can’t reach
For materials, plan on washed crushed stone or open-graded aggregate for the base, bedding sand, and polymeric sand or regular joint sand for the final joints. A woven geotextile fabric is worth adding if you’re separating a questionable subgrade from the new base layer, and keep a few extra pavers on hand in case any crack during removal. For guidance on base depth and estimating how much material to buy, this base depth guide offers further details.
Don’t forget work gloves and safety glasses, since prying up pavers and running a compactor both kick up debris.
Pro Tip: Order extra aggregate beyond the volume you calculate on paper. Compaction reduces loose material volume, and you don’t want to stop mid-repair for a second supply run.
How to Repair Sunken Pavers Step by Step
This is the core procedure for a lift-and-relay repair, the same approach professionals use for isolated sinking that doesn’t involve a failed subgrade.
-
Mark the repair boundary and remove pavers. Don’t stop at the edge of the visible dip. Industry guidance for interlocking concrete installation recommends removing extra rows beyond the depression so you reach undisturbed, stable base material and have enough room to screed evenly.
-
Pull the bedding sand and inspect the base. Scrape away the old sand layer and look closely at what’s underneath. Soft spots, washed-out channels, or visibly eroded aggregate confirm that water has been moving through the area. This is also when tree roots or an unexpectedly soft subgrade reveal themselves.
-
Rebuild the base in lifts. Add crushed stone in layers, compacting each one before adding the next rather than filling the whole depth at once and compacting a single time. Uncompacted layers settle unevenly no matter how thick they look. If the subgrade soil itself seemed unstable during inspection, laying a geotextile fabric between subgrade and base helps keep the two layers separated and reduces future migration.
-
Screed the bedding sand and reset the pavers. Use screed rails to level a bedding sand layer, typically around 5/8 inch where your paver design calls for it. Place the pavers back in their original pattern, then run the plate compactor over the area, overlapping onto the surrounding undisturbed pavers so the new section ties in evenly. Use that same 5,000 lbf compactor here, not a lighter unit, since under-powered compaction is one of the most common reasons repairs fail early.
-
Sweep in joint sand and compact again. Spread polymeric sand or regular joint sand across the surface, sweep it into the joints, and run the compactor again to settle it fully. CMHA maintenance guidance recommends leaving the finished surface about 1/16 to 1/8 inch higher than the surrounding pavers to account for natural consolidation over the following weeks. Keep the finished surface even with the surrounding pavers.
For larger or oddly shaped voids under a slab or large paved section, some contractors use flowable fill, also called controlled low-strength material, as an alternative to compacted aggregate. It self-levels and cures without compaction equipment, which saves time on big jobs, but it’s harder to excavate later if you ever need to access utilities underneath, and it costs more per cubic yard than crushed stone.
If pavers keep settling in the same spot after a proper repair, or if joint sand keeps washing out over time, that’s usually a sign the drainage problem was never fully addressed rather than a sign you compacted incorrectly. At that point, a professional drainage assessment is worth more than a third attempt at the same patch. Our paver project gallery shows what a properly rebuilt base and surface look like once finished.
What It Costs to Fix Sunken Pavers
Patio repair costs typically fall between $726 and $2,485, with the final number depending heavily on your patio material and how much damage needs addressing. Paver repairs tend to land toward the higher end of that range because fixing sunken pavers usually means lifting, rebuilding the base, and resetting the surface rather than simply patching a crack, which is a faster job on a poured concrete slab.
A few factors move your quote up or down:
- Area size. A small, isolated dip costs far less to fix than a settled section spanning a large patio or walkway.
- Base remediation needs. If the base is eroded or the subgrade is unstable, rebuilding it in compacted lifts adds labor and material cost beyond a simple sand-and-reset job.
- Drainage work. Installing an edge drain or regrading for positive slope adds to the project but prevents the same section from sinking again.
- Material choices. Replacing cracked or discolored pavers with new units costs more than reusing the originals.
- Labor and equipment. Renting a plate compactor for a weekend DIY job costs far less than hiring a crew with their own equipment, but a crew brings compaction consistency a rental tamper may not match.
When comparing quotes, ask contractors whether they test base compaction after rebuilding and before resetting pavers. That single question separates a contractor who treats the base as the foundation it is from one who’s mainly replacing the visible surface.
How to Prevent Pavers From Sinking Again
A repaired section stays repaired longer when the conditions that caused the original sinking get addressed, not just the symptom.
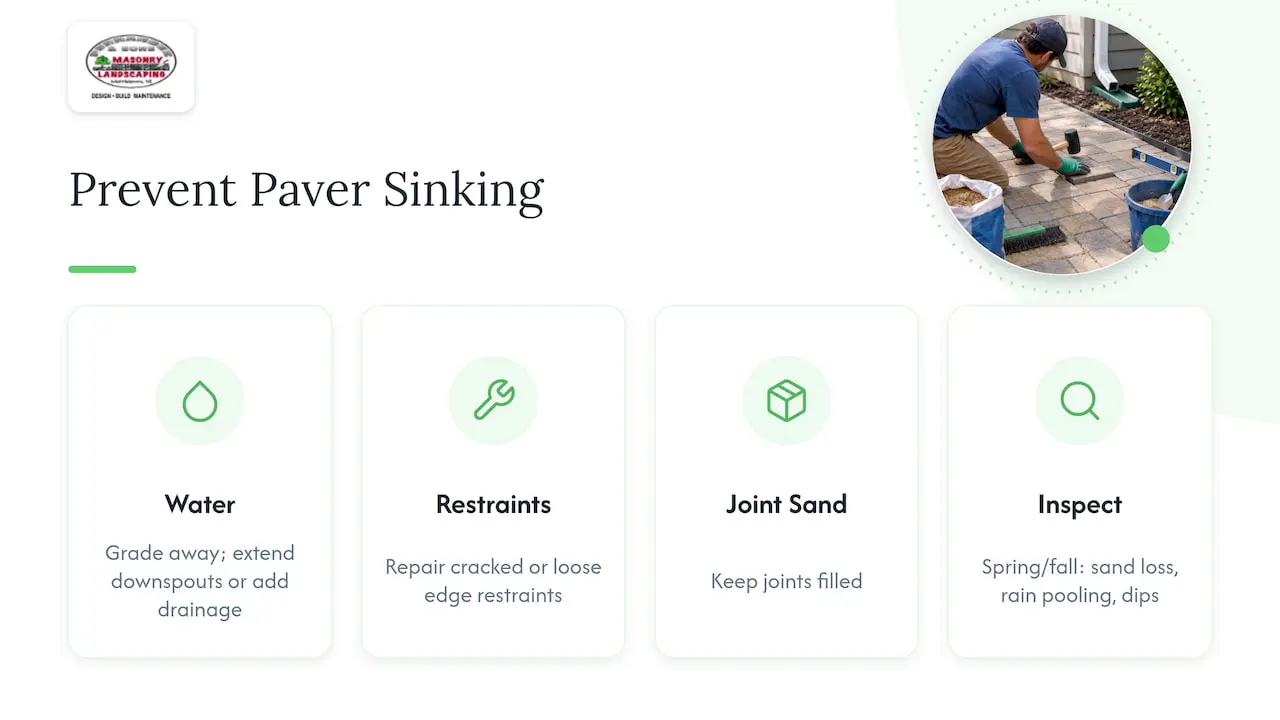
Start with water. Make sure the ground slopes away from your home and any paved area, and extend downspouts so they discharge well clear of the patio or walkway edge. Where infiltration has been a repeat problem, a permeable base or an edge drain system gives water somewhere to go besides underneath your pavers. The Federal Highway Administration’s drainage guidance notes that properly designed drainage elements, including permeable bases and edgedrain systems, remove infiltrated water before it can undermine the structure beneath a paved surface.
Check edge restraints periodically and repair or replace any that have cracked or pulled loose, since they’re what keeps the whole field of pavers locked together under load. Keep joints filled, since sand loss is often the first visible sign that something underneath is shifting. For guidance on keeping sealed joints intact longer, our paver sealing prep guide covers what makes a seal last. If you’re cleaning the surface, pressure washing without stripping joint sand is worth reading before you point a washer at your patio.
Pro Tip: Walk your paved areas each spring and fall, and look specifically for joint sand loss, pooling after rain, or the first hint of a dip. Catching movement early means a small patch instead of a full base rebuild.
What We See Most Often in the Field
A homeowner may notice a dip, assume it’s cosmetic, and wait a season or two before calling. By then, the base erosion or drainage issue that caused the original sinking may have gotten worse.
The pavers themselves are rarely the problem. It’s almost always what’s underneath, whether that’s a base that was never compacted correctly at installation or water finding a path it shouldn’t have. That’s why we start every repair assessment by looking at the base and the surrounding grade rather than just resetting what’s visible. A patch job on a bad base may not last; rebuilding it properly addresses the underlying problem. Readers who want to understand what a durable base actually looks like from the start can check our guide on building a durable paver base.
— BG
How Fernandez & Sons Can Rebuild Your Pavers for Good
When sunken pavers point to a base or drainage problem rather than a quick surface fix, we handle the repair: masonry repair services, paver resets, concretework for base and edge support, and drainage corrections.

A visit from our team starts with an assessment of the base, the grade around the affected area, and any signs of erosion or standing water, so we can tell you honestly whether you’re looking at a lift-and-relay repair or something larger. We offer free estimates, backed by our satisfaction guarantee, so you know what you’re paying for before any pavers come up.
If your checklist turned up pooling water, repeated settlement in the same spot, or a depression too large to comfortably tackle yourself, that’s exactly the situation we’re built to handle:
- Masonry repair and base rebuilding for sunken or settled paver sections
- Paver patio installation for full replacements where the original base was never adequate
- Concretework for edge restraints, footings, or capping tied into the repair
- Drainage corrections, including grading and edge drains, to prevent recurrence
Reach out through our services page to schedule a free estimate and get a straight answer about what your pavers need.
FAQ
How do you fix sunken pavers?
Lift the pavers in the affected area, plus two extra rows beyond the visible dip, then remove the old bedding sand and inspect the base underneath. Rebuild the base in compacted layers, reset the pavers with fresh bedding sand, and compact the surface with a plate compactor rated at 5,000 lbf or higher before sweeping in joint sand.
How much does it cost to fix sunken pavers?
Patio repair costs typically range from $726 to $2,485, with paver repairs often landing toward the higher end since they usually require base rebuilding rather than a simple patch. Larger areas, base remediation, or added drainage work push costs higher within that range.
What should you put under sunken pavers?
Use washed crushed stone or open-graded aggregate for the base, compacted in layers rather than all at once, with a bedding sand layer on top before the pavers go back down. A geotextile fabric between the subgrade and the new base is worth adding if the soil underneath looked unstable during inspection.
What causes pavers to sink?
The most common cause is inadequate base compaction during the original installation, which lets the crushed stone layer settle unevenly over time. Poor drainage, eroded or washed-out base material, failed edge restraints, tree roots, and frost heave all contribute as well, and water-related erosion often makes any of the others worse.
How long does a sunken paver repair take?
Repair time depends on the size of the affected area and whether the work uncovers drainage problems or requires additional base remediation and curing.
Sources
- How Much Does Patio Repair Cost? 2026 Data | Angi
- The Myth of Self-compacting Aggregates
- Archived – Construction of Pavement Subsurface Drainage Systems (Reference Manual)